|
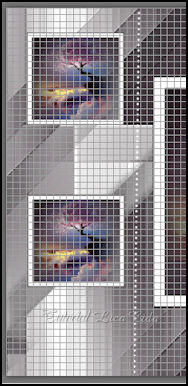
"Wish You"
MATERIAL AQUI
Tubes:SuizaBella_Ref_AG-004227\Renee-TUBES-Paysage
10\038FlorByPqnaAlice
Brushes: designal brushes 3_12
.Back: backlc
Deco:002DecorByPqnaAlice
Obrigada!!!.
(Agradeço)
Marca D'água .
Efeitos do PSP.
PLUGINS
FFG\B _ Button Deluxe...
Plugin Galaxy \ Instant Mirror
FFG\B_ Vibes.
Plugin VanDerLee \ UnPlugged-X...
Plugin Alien Skin \ Eye Candy 5 Impact
Plugin DSB FLUX \Linear Transmission
Plugin Nick Software
Tutorial
1-Abrir o material no PSP, duplique e feche o original.
Escolher duas cores para trabalhar.
Foreground #817f84
Background #25181f
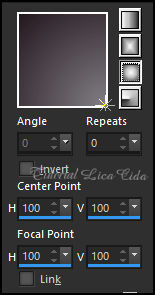
2-Abrir nova imagem transparente 800 x 550 , pintar com o gradiente
Sunburst ,
formado pelas cores em uso.
3- FFG\B _ Button Deluxe...Default.

4- Plugin Galaxy \ Instant Mirror_ Quadrante SE.
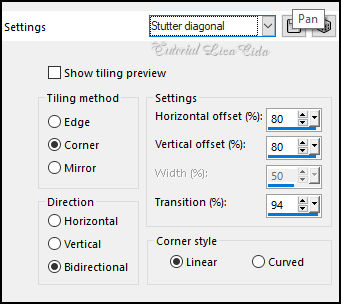
5-Effects\ Image Effects\ Seamless Tiling_ Stutter diagonal.
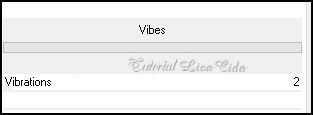
6-FFG\B_ Vibes_Default.
Layer\ Duplicate.
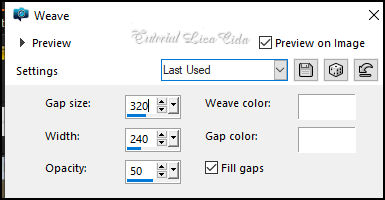
7-Effects\ Texture Effects\ Weave.
(#ffffff )
8-Effects\ Image Effects\ Seamless Tiling_Side by
side.
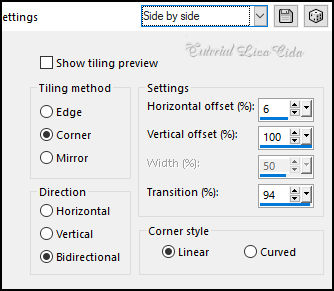
9-Edit Repeat:
*Effects\ Image Effects\ Seamless Tiling_ Shutter diagonal.
*FFG\B_ Vibes.
( veja print, mesmos valores )
10-Tecle a letra ( S ).
Ativar Custom Selection.
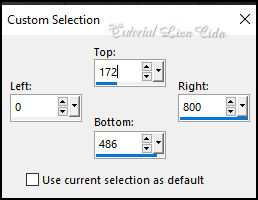
Promote Selection to Layer.
11-Effects \ 3D Effects \ Drop Shadow. 7\ 0\ 50\ 15,00. Color=#000000
.
Selections \ Select None.
12- Edit Repeat:
*Effects\ Image Effects\ Seamless Tiling_ Shutter diagonal.
( veja print )
13-View\ Rulers ( ativar a régua) .
Com a Ferramenta Pick Tool _Default, da esquerda para direita,
trazer o efeito a 410 pxls.

(desativar a régua )
*Image\ Mirror Vertical
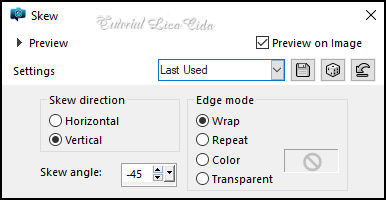
14-Effects\ Geometric Effects\ Skew.
15-Effects\ Reflection Effects\ Rotating Mirror...
Default.
16-Plugin VanDerLee \ UnPlugged-X... Defocus . Defocus 6.
( restante default ).
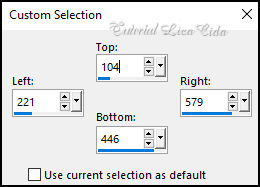
17-Tecle a letra ( S ).
Ativar Custom Selection.
18-Layers \ New Raster Layer.
Pintar color=#ffffff.
19-Effects\ 3D Effects\ Chisel.
( cor usada no background )
Size2 _ Solid color.
20-Selections \ Modify \ Contract \16 pixels.
_Pintar color usada no background .
21-Selections \ Modify \ Contract \ 2 pixel. Delete.
_Pintar com o gradiente em uso ( ainda selecionado...
22-Edit Copy no tube Renee-TUBES-Paysage 10 .Paste As New Layer .
Resize 80% duas vezes . Posicione.
Selections \ Invert. Delete.
Selections \ Select None. Layer\Merge\Merge Down.
Adjust\ Sharpness\ Sharpen .
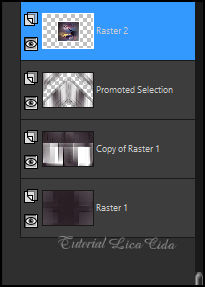
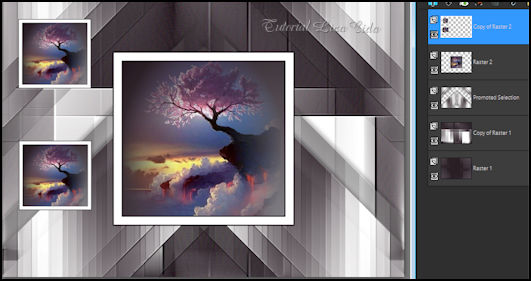
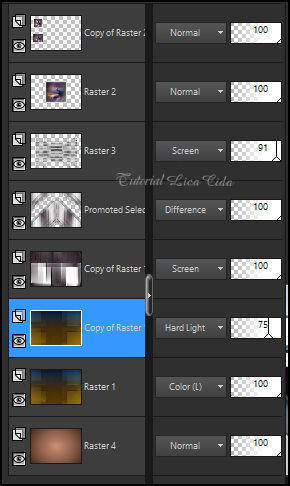
Layers, conferir:
23-Layer\ Duplicate.
Rezise 40%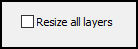
Layer\ Duplicate.
_Posicione como modelo.
Layer topo: Layers\ Merge Down
24- Layer topo.
Layers \ New Raster Layer ( raster3)
Ative a ferramenta Pentool. Foregrond color=#ffffff \ Background
anula.
Configure a Pentool, Slyle Lines Diamond.

Na layer que você criou ( raster3) , clique em
View Grid
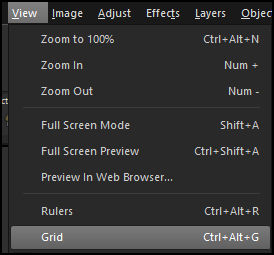
Depois em View Grid , Guide & Snap Properties _
Abrirá assim como o print. Dê OK.

Ative a Pentool já configurada e faça 1 risco com
vê na imagem
Fazendo isso seu risco sae retinho, desative o
Grid , estará assim:

Plugin Alien Skin \ Eye Candy 5 Impact \ Motion
Trail

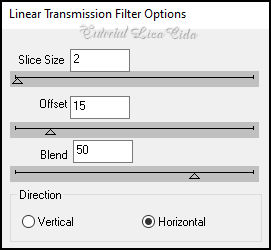
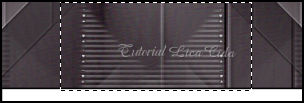
Plugin DSB FLUX \Linear Transmission
Layers Duplicate. Image Mirror Horizontal.
Layer\Merge\Merge Down.
Effects\ Edge Effects\ Enhance More.
Effects \ 3D Effects \ Drop Shadow. 1\ 1\ 75\ 4,50. Color=#000000 .
Layers\ Arrange\ Move Down.( aplicar duas vezes)
Selecionar o efeito na parte superior e inferior_Delete
Layers Duplicate. Layers\ Merge Down.
25-Layers \ New Raster Layer .( raster4)
Layer\ Arrange\ Send to Bottom.
Selections \ Select All. Edit\ Copy no backlc . Edit\ Paste Into
Selection. Selections \ Select None .
26-Ativar a Raster1 .
Plugin Nik Software \Color EfexPro 3.0 \ Bi-Color Filters . Color
Set\ Cool Warm 1.
Layers Duplicate
layers, opacity, blends
(Conferir, use a gosto)
27- Ativar a Layer Promoted Selection.
Edit \Copy no designal brushes 3_12 \ Edit \ Paste a New Layer.
Image Mirror Horizontal \ Image Mirror Vertical
28-Image \ Add Borders \ 2 pxls background
Image \ Add Borders \ 16 pxls #ffffff
Image \ Add Borders \ 2 pxls background
Image \ Add Borders \ 16 pxls #ffffff
29-Edit Copy no SuizaBella_Ref_AG-004227\Edit \ Paste a New Layer.
Posicione.
30-Edit Copy no 038FlorByPqnaAlice\Edit \ Paste a New Layer.
Posicione.
31-Edit Copy no 002DecorByPqnaAlice_modificado para o tutorial (
segue original) \Edit \ Paste a New Layer.
Posicione. Layers Properties_ Blend Mode Luminance(L).
Image \ Add Borders \ 2 pxls background
Aplicar a marca d'água.
Assine e salve.
File \ Export \ JPEG Optimizer.
Aparecida, abril de 2024.
:::...VOLTAR...:::
|
