Tubes: Callitubes-2632mulheres
Callitubes-69natal.
Deco: \deco1-lc\deco2-lc\deco3-lc
Adereços:
adereçolc\ Callitubes-322decor.pspimage\Callitubes-319decor.pspimage.
Titulo:Winter_2022_bylc
Plugins
Plugins Alien Skin Eye Candy 5:
Impact
Plugins
MuRa's Meister
Plugins dsb flux
Plugins VM
Distortion
Plugins Medhi
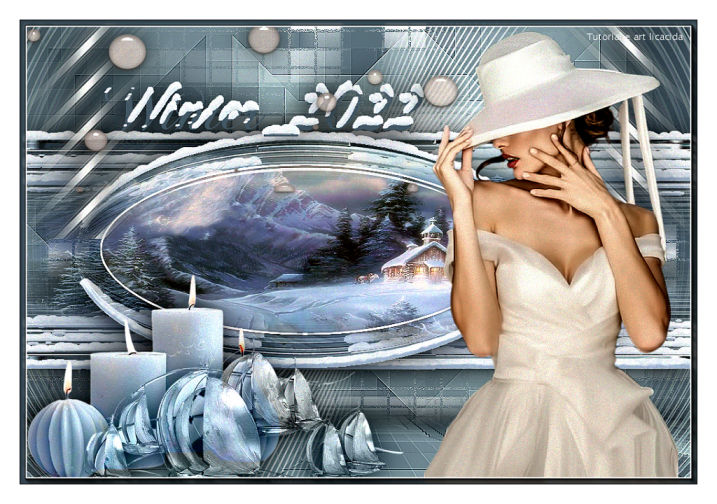
Tutorial
Configurar
Foreground
#4d5c67 ( cor escura) \ #cfe8e9 _Background ( cor
clara)
1-Abrir o
arquivo alphachannel.
_Selections \Load \ Save
Selection \Load Selection From AlphaChannel \
Selection#1.
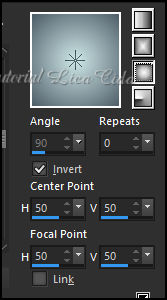
2-Preencher
com o gradiente Linear. Angle 90 \Repeats0. Invert
desmarcado. Formado pelas cores
configuradas acima.
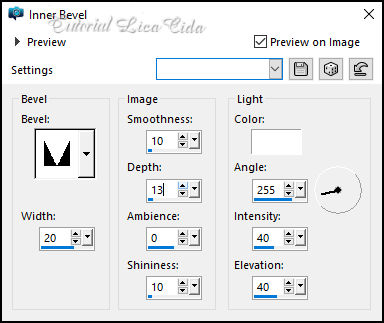
3- Effects\ 3D Effects\ Inner
Bevel...
Selections\ Select none.
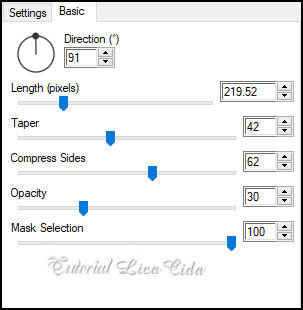
4-Plugins Alien Skin Eye Candy
5: Impact \ Motion Trail... Basic.
5- Plugins dsb flux...Linear
Transmission.
Layers Duplicate.
_Image Mirror Vertical.
_Layers\ Merge\ Merge Down .
Effects \ Edge Effects \ Enhance More.
6- Effects\ Distortion Effects\
Pinch_ S ( %) :100. Edit \ Repeat.
Layers Duplicate.
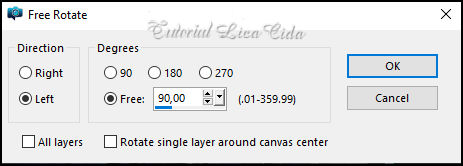
7- Image\ Free Rotate.
8-Effects\ Image Effects\
Offset.
-350\0 ( custom e
transparentes marcados).
9-Plugins
MuRa's Meister\Pole
Transform.
Layers Duplicate.
Image Mirror Horizontal. Layers\
Merge\ Merge Down .
_Layers\ Arrange\ Move Down.
10-Raster1.
Layers Duplicate.
_Effects\ Geometric Effects\
Circle_Transparent.
11-Layers \ New Raster Layer.
_Selections \Load \ Save
Selection \Load Selection From AlphaChannel \
Selection#2.
12-.Edit
Copy Callitubes-69natal\ Edit Paste Into
Selection .
_Adjust\ Sharpness\ Sharpen.
13-Selections\ Modify \ Contract _ 35
pxls.
Promote\Selection\ to Layer.
14- Plugins \ Alien Skin Eye Candy
5 _ Impact \ Glass_ Settings gold.
15-Selections\ Modify \Select
Selection Borders.
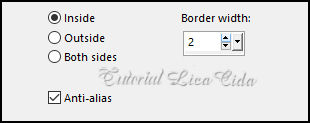
_Layers \ New Raster Layer.
Preencher com a cor #ffffff.
Selections\ Select none.
Layers\ Merge\ Merge Down ( aplicar
duas vezes).
*Adjust\ One Step Photo Fix.
16-Layer Raster1.
_Layers \ New Raster Layer.
_Selections \Load \ Save
Selection \Load Selection From AlphaChannel \
Selection#3.
17-Edit
Copy Callitubes-69natal\ Edit Paste Into Selection
. ( deverá estar na memória) Selections\ Select
none.
_Adjust\ Sharpness\ Sharpen More.
Layers Duplicate.
Layers\ Merge\ Merge Down .
18-Layers \ New Raster Layer. Layers\
Arrange\ Send to Bottom.
_Preencher com o gradiente Sunburst.
Cores configurdas acima.
Layers_Confere
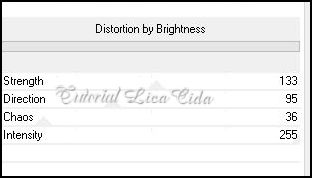
19-Raster4.
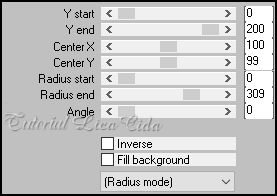
_Plugins VM Distortion
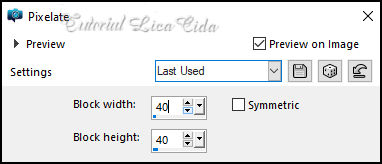
20- Effects\
Distortion Effects\ Pixelate.
21- Plugins Medhi
Sorting Tile.
Effects \ Edge Effects \ Enhance More.
Layers Duplicate.
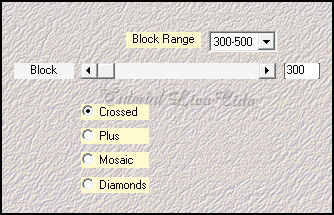
22-Plugins MuRa's
Meister \ Perspective Tiling.
*Com a Ferramenta Magic
Wand \ Feather 60 \ Clique na parte transparente .
Deletar ( quatro\cinco vezes _ para suavizar o efeito.
).
Selections \ Select
none.
*Emboss3.
_Effects \Reflection Effects \ Rotating Mirror .
0\180 _Reflect.
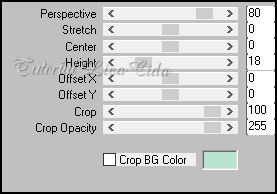
*Plugins Alien Skin Eye Candy 5 : Impact\ Perspective
Shadow_use a gosto.
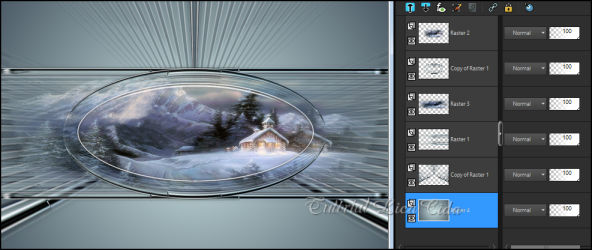
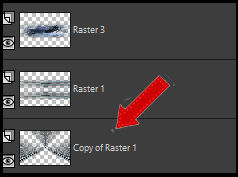
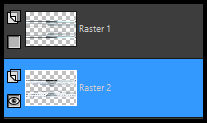
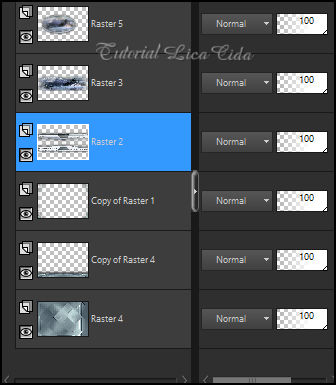
23-Ativar a layer indicada como mostra o print, observe
a seta :
Edit \ Repeat: Plugins
MuRa's Meister\Pole Transform.(
Print ítem 9).
_Effects \ Edge Effects \ Enhance More.
Edit \ Repeat :*Plugins
Alien Skin Eye Candy 5 : Impact\ Perspective
Shadow_use a gosto.
24-Selections \Load \ Save Selection \Load
Selection From AlphaChannel \
Selection#4.
Delelete\ Selections \ Select
none.
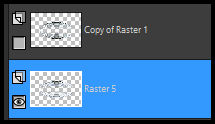
25-Ativar a Copy of Raster1.( abaixo da layer do
topo).
_ Tirar a visibilidade da layer. Edit
Copy no efeitoellipse_SnowDrift\ Paste As New
Layer.
_Layers\ Arrange\ Move Down.
_DELETE a layer que vc tirou a
visibilidade.
Raster5: *Plugins Alien Skin
Eye Candy 5 : Impact\ Perspective Shadow_use a
gosto.
_ Layer do topo _ Layers\
Merge\ Merge Down .
26-Ferramenta Pick Tool _Position X 27 _
Position Y 118. Tecle M para desativar a
ferramenta.
27-Ativar a Raster1.( layer do
retangulo).
_ Tirar a visibilidade da
layer. Edit Copy no
efeitoretangulo_SnowDrift\ Paste As New Layer.
_Layers\ Arrange\ Move Down.
_DELETE a layer que vc tirou a
visibilidade.
Raster2: *Plugins Alien Skin Eye
Candy 5 : Impact\ Perspective Shadow_use a gosto.
Layers_Confere
28-Raster 4 (do fundo) _Edit
Copy no deco1-lc \Paste As New Layer.
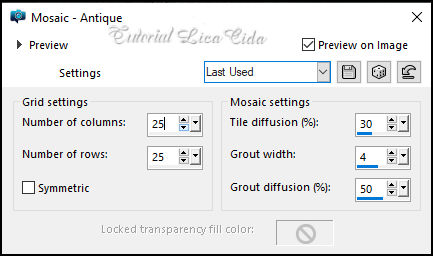
29-Effects\ Texture Effects\ Mosaic Antique.
30-Effects \ Image Effects \ Seamless
Tiling. Default _ Transition (%): 100.
_ Effects \ Edge Effects \Enhance.
31-Edit Copy no deco2-lc \Paste As New Layer.
*Usar a ferramenta Pick Tool para acertar
a altura.
_Properties \
General \Blend Mode Screen.
*Layers\
Arrange\ Move Up.
32-Layer do topo.
Edit Copy no deco3-lc
\Paste As New Layer.
_Objects\ Align\
Top.
*Plugins Alien Skin Eye Candy 5 : Impact\
Perspective Shadow_use a gosto.
33-Edit Copy nos
adereços anexados \Paste As New Layer.
Posicione, use a
gosto.
Opcional_ *Plugins Alien Skin Eye Candy 5 : Impact\
Perspective Shadow_use a gosto.
34-Edit CopyCallitubes-2632mulheres\Paste As New Layer.
*Plugins Alien Skin Eye Candy 5 : Impact\
Perspective Shadow_use a gosto.
35-Edit Copy no titulobylc\Paste As New Layer.
Posicione, use
a gosto.
_Image \ Add Borders \ 4
pxls color#escura
36- Plugins AAA Frames_Foto Frame.Width8 _Matte2
_ Restante : Default.
_Image \ Add
Borders \ 30 pxls color# ffffff.
Aplicar a Marca
D'agua.
Assine e salve.
Aparecida \
licacida , novembro de 2022.
Espero que apreciem.
Obrigada!