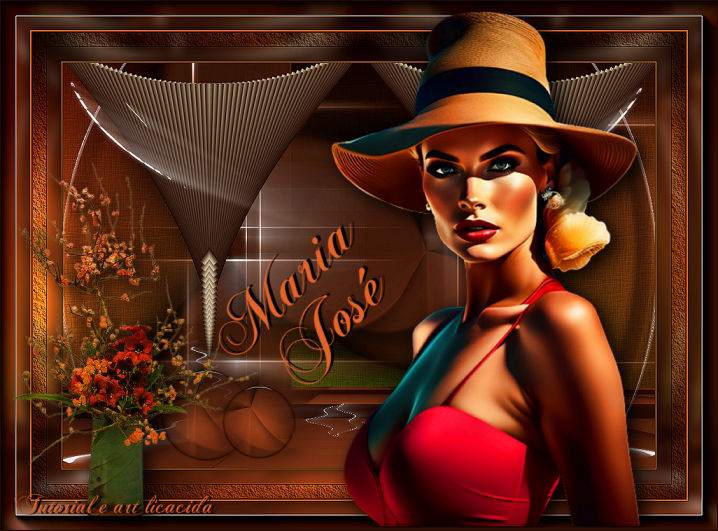
|
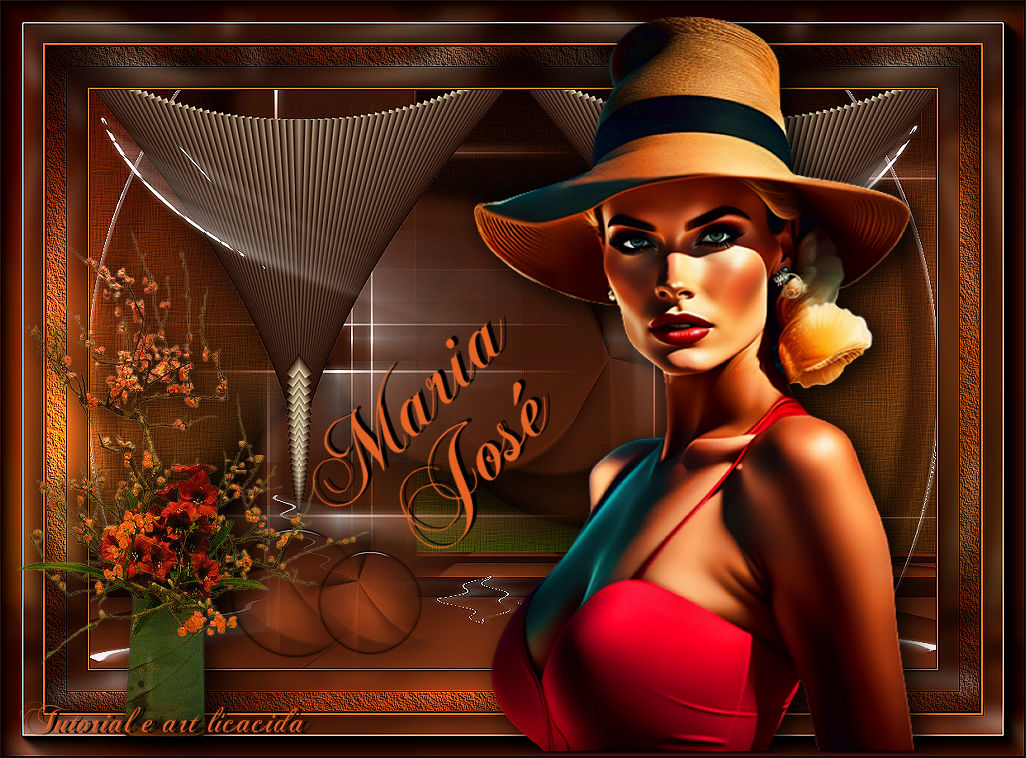
"Maria
José"
MATERIAL AQUI
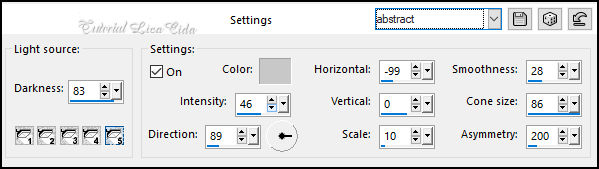
Preset Illumination\ Lights_lights \ abstract. (
Guardar em sua pasta de Presets My PSP Files).
Tubes:Callitubes-3235mulheres\Callitubes-162flores
Texture:Corel_15_013.
Mask:!!!!gradientedworisch
Deco:circledeco-bylc\circulo acabamento-bylc\decochão-bylc\decotopo-bylc
Tituloby lc.
Obrigada!!!.
(Agradeço)
Marca D'água .
Efeitos do PSP.
PLUGINS
FFG\B _ Button Deluxe
Plugin Mura's Meister\Pole Transform.
Alien Skin\Eye Candy 5 Impact\ Motion Trail.
Plugin \ AAA Frames \Texture Frame\Foto Frame
Tutorial
1-Abrir o material no PSP, duplique e feche o original.
Escolher duas cores para trabalhar.
Foreground #2b1008
Background #e66326
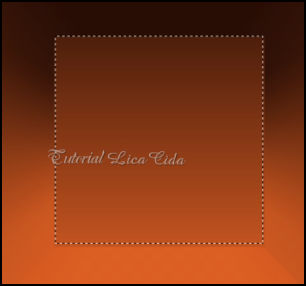
2-Abrir a imagem anexada_bylc.
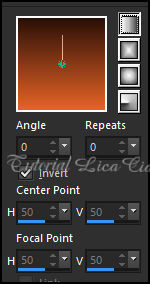
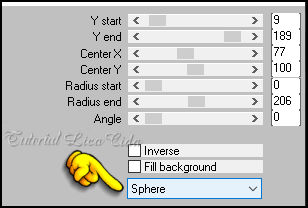
Layers \ New Raster Layer. Pintar com o gradiente Linear ,Angle 0\Repeats
0, invert marcado,
formado pelas cores em uso.
3-FFG\B _ Button Deluxe...

4-Com a ferramenta Selection
Toll( S) \ selecionar o efeito .
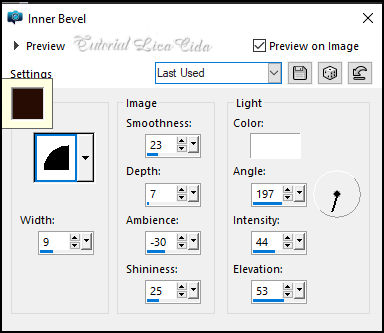
5-Effects\ 3D Efects\ Inner
Bevel.
Promote Selection to
Layer
Selections\ Select none.
6-Effects\ Image Effects\ Seamless Tiling: Side by side.
7-Plugin Mura's Meister\Pole Transform.
Effects \ 3D Effects \ Drop
Shadow: 10, 10, 100, 50,00, color #000000.
Negativo-10, -10.
8-Edit Repeat: Effects\ 3D Efects\ Inner Bevel (layer do topo)
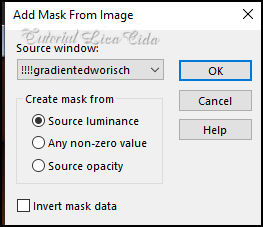
9-Layers \ New Mask Layer \ From Image: !!!! gradientedworisch
Effects\ Edge Effects\
Enhance. Layers \ Merge \ Merge Group.
10-Edit Repeat na layer inferior Raster2:
Layers \ New Mask Layer \ From Image: !!!! gradientedworisch
Effects\ Edge Effects\ Enhance. Layers \ Merge \ Merge Group.
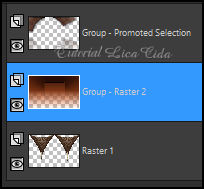
11- Ativar a Layer do topo :
Group_Promoted Selection.
( print ítem 7) Plugin Mura's Meister\Pole Transform.
layers duplicate\ image mirror vertical
layers duplicate\ image mirror horizontal
12-Usar a layer do topo . Layers \ New Raster Layer.
Mudar a cor do Foreground para #ffffff.Usar a ferramenta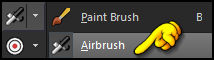 com
as configurações indicadas. com
as configurações indicadas.

Usar como modelo( são três
traços de cada lado)
13-Effects\ Geometric
Effects\ Skew
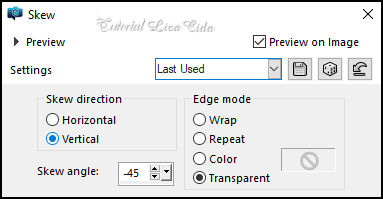
_Layers Duplicate\ Image
Mirror Horizontal.
Layers\ Merge\ Merge Down.
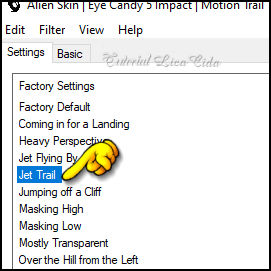
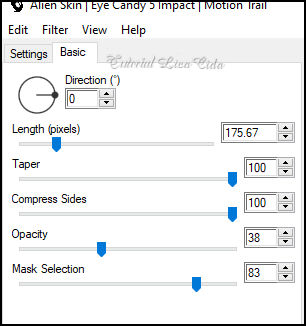
14-Alien Skin\Eye Candy 5 Impact\ Motion Trail.
15-Plugin Mehdi \ Weaver.
_Layers Duplicate\ Layers\
Merge\ Merge Down.
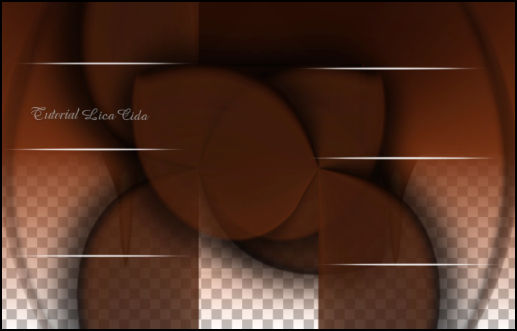
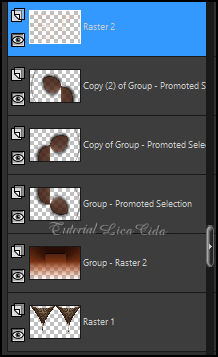
O tutorial\layers
16- Image\ Canvas Size 1024x
700. Bottom 50.
17- Ativar a Layer Group -Raster2.
Plugin MuRa's Meister \ Perspective Tiling: Height 20.
18-Effects \Reflection Effects \ Rotating Mirror . 0\0 _Reflect.
19-Layers \ New Raster Layer. Layers\Arrange\ Send to Bottom
_Preencher com o mesmo gradiente em uso.
20-Effects\Texture Effects\ Texture
( segue anexada_Corel_15_013_ ou use a gosto)
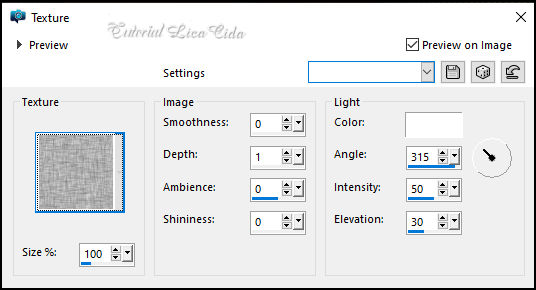
21-Effects\ Illumination
Effects\Preset Illumination\Light\abstract.
22- Raster1.
Layers Arrange Bring to Top
23-Edit \Copy no circulo acabamento-bylc \ Paste a New Layer.
Use a gosto.
24-Edit \Copy no circledeco-bylc \ Paste a New Layer.
Usar abaixo da raster1.
25-Edit \Copy no decochão-bylc. Edit \ Paste a New Layer.
Objects\Align \Bottom.
26-Edit \Copy no decotopo-bylc. Edit \ Paste a New Layer.
Layers Arrange Bring to Top
Está certo o local a ser usado
Borders
Image \ Add Borders \ 1 pxl color #escura
Image \ Add Borders \ 2 pxls color #clara
Image \ Add Borders \ 1 pxl color #escura
Copy
Selections \ Select All
Image \ Add Borders \ 50 pxls color#ffffff.
Invert
Edit Paste Into Selection.
Adjust\ Blur\ Gaussian Blur. 10,00.
Effects \ Plugin \ AAA Frames \ Texture Frame.
Width 25 ,demais valores Default. Edit Repeat.
Invert
Effects \ 3D Effects \ Drop Shadow: 0, 0, 80, 40,00, color #000000.
Selections\ Select none.
Image \ Add Borders \ 1 pxl color #escura
Image \ Add Borders \ 2 pxls color #clara
Image \ Add Borders \ 1 pxl color #escura
Copy( deverá estar na memoria)
Selections \ Select All
Image \ Add Borders \ 50 pxls color#ffffff.
Invert
Edit Paste Into Selection.
Adjust\ Blur\ Gaussian Blur. 10,00.
Effects \ Plugin \ AAA Frames \Foto Frame. Width 25, Matte1, demais
valores Default. Edit Repeat.
Invert
Effects \ 3D Effects \ Drop Shadow: 0, 0, 80, 40,00, color #000000.
Selections\ Select none
27-Edit \Copy no Callitubes-3235mulheres (1) . Edit \ Paste a New
Layer.
Posicione, use a gosto
28-Edit \Copy no Callitubes-162flores \ Edit \ Paste a New Layer.
Posicione, use a gosto
29- Use o Título a gosto!!
Resize _Width 1024 pxls.
Aplicar a marca d'água.
Assine e salve.
File \ Export \ JPEG Optimizer.
:::...VOLTAR...::: |