
|
|
Versões Amigas
|
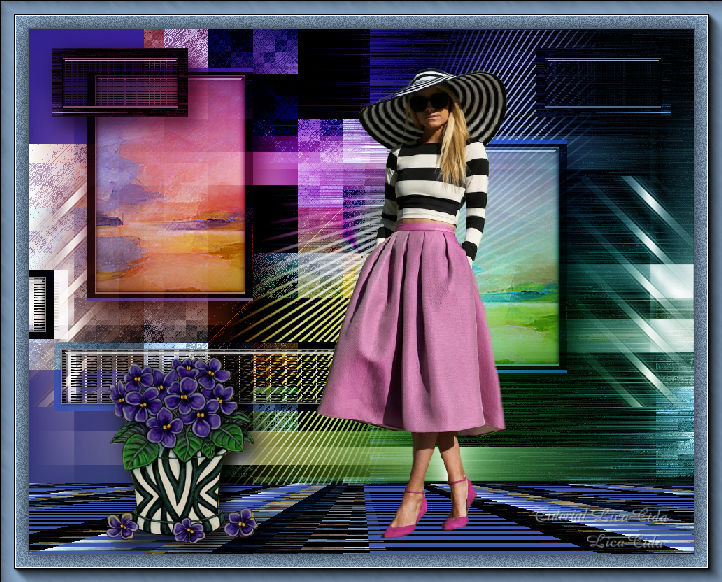
"Sophie"
Selecões: Imagem alpha
channel_lc - Seleção1 - Seleção2- Seleção3.
Seleção4.
(Guardadas em Canal Alfa a Imagem ) Tubes:
naisemulheres150 \12_abstrait_animabelle \
GG09~AfricanViolets_001.
(Agradeço)
Deco:deco1lc \ deco2lc \ deco3lc.
Marca
D'água . Efeitos do PSP.
Versão usada PSPX8.
Plugins
Unlimited 2 &<BKg Designer sf10I
>.
Plugin
Alien Skin Eye Candy 5: Impact.
Plugin UnPlugged Effects.
Plugin
dsb flux.
Plugin
MuRa's Meister .
Tutorial _Roteiro
1-Abrir alphachannel_lc, fazer uma cópia,
fechar ( minimizar ) a original. Preencher com uma cor retirada
do misted ( #819bb6 _ procure uma cor
clara ). _ Select All. Edit Copy no
tube12_abstrait_animabelle \ Edit Paste Into Selection .
Selections\ Select none.
_Effects \ Image Effects \ Seamless
Tiling _ Default \Transition 100.
_ Adjust \ Blur \ Gaussian
Blur . R= 28,00.
2-Nova
Layer
_Preencher com uma cor mais escura (
#4e5d70).
_Effects\ Artistic Effects \ Chrome.
 _Blend
Mode= Overley . Opacity 73%.
_Layer\ Merge\ Merge Down.
_Adjust\ Add/
Remove Noise \ JPEG Artifactal Removal... ( Maximum\ C=78) .
_Plugin FMTT\ Blend
Emboss.
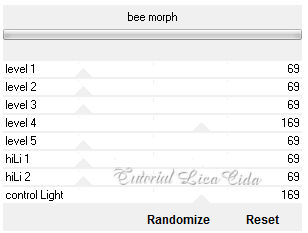
3-Unlimited 2 &<BKg Designer sf10I
> \ bee morph.
 _Layer
duplicate.
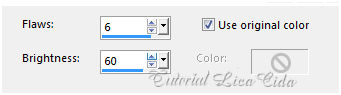
4-Plugin UnPlugged
Effects\ Disco Lights... Default ( 0-128-0)
_Blend Mode= Soft
Light.
5-Ativar a Raster1.
_Selection\ Load Selection from
Alpha Channel Selection #1.
_Promote Selection to
Layer.
_Selections\ Select
none.
6-Plugin dsb flux\ Bright Noise...
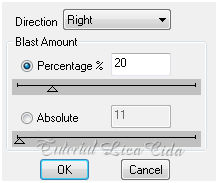
 7-Plugin dsb flux\ Blast . Usar as duas
opções.
1-
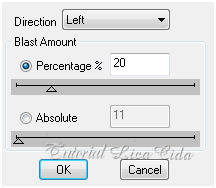 2- 2-
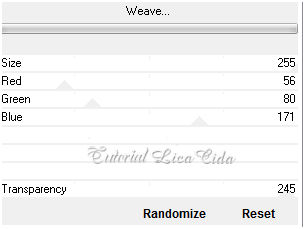
 8-Ativar a Raster1. _ FFG\ "A" - Weave
 9-Voltar a
layer superior ( Promote Selection ) .
_Selection\
Load Selection from Alpha Channel Selection #2.
_Promote
Selection to Layer.
10- Selections\ Modify \
Contract 25 pxls.
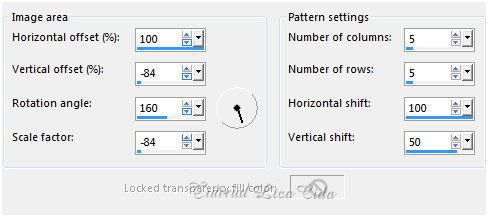
_ Effects \Reflection
Effects\ Pattern.
 *Plugin Alien Skin Eye Candy 5: Impact\
Glass... (use a gosto).
11-Effects\ 3Deffects\ Chisel.
_color=#ffffff. 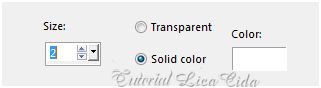
_Selections\ Select
none.
Resize
60%.
_ Effects\ Image Effects\
Offset . H= (menos) -449 \ V=103 . Custom e
Transp.
_Effects \Reflection
Effects \ Rotating Mirror . H = 0 \ R=
180 \ Repeat.
*Plugin Alien Skin Eye Candy 5 : Impact\
Perspective Shadow_Blurry.
12-Ativar a Raster1.
_Selection\ Load Selection from Alpha Channel
Selection #3
_Promote Selection to
Layer.
_Layer\ Arrange \ Move
Up.
13- Selections\ Modify \
Contract 12 pxls.
_ Effects \Reflection
Effects\ Pattern (
veja print ítem 10).
14-Edit Copy
no tube12_abstrait_animabelle \ Paste As New
Layer.
_Posicione a gosto .
Invert_Delete_ Invert.
_Adjust\
Sharpness\ Sharpen More.
_Layer\ Merge\ Merge
Down.
*Plugin Alien Skin Eye
Candy 5: Impact\ Glass... (use a
gosto).
15-Effects\ 3Deffects\
Chisel. ( print ítem 11
). _Selections\ Select
none.
_Layer \ Duplicate.
Repetir:
_ Effects\ Image Effects\
Offset . H= (menos) -449 \ V=103 . Custom e
Transp.
_Layer\ Merge\ Merge
Down.
*Plugin Alien Skin Eye Candy 5 :
Impact\ Perspective Shadow_Blurry.
16- Voltar a ativar a Raster1.
_Selection\ Load Selection from Alpha Channel
Selection #4.
_Promote Selection to
Layer.
17- Selections\ Modify \
Contract 12 pxls.
_ Effects \Reflection
Effects\ Pattern (
veja print ítem 10).
*Plugin Alien Skin Eye
Candy 5: Impact\ Glass... (use a
gosto). 18-Effects\ 3D
Effects\ Chisel. ( print ítem 11
).
_Selections\ Select
none.
_Effects \ 3D
Effects \ Drop Shadow 0\ 20\
80\ 0. Color=ffffff. _Layer \Arrange \Bring to Top.
_Layer \ Duplicate.
Repetir:
_ Effects\ Image Effects\
Offset . H= (menos) -449 \ V=103 . Custom e
Transp.
_Layer\ Merge\ Merge
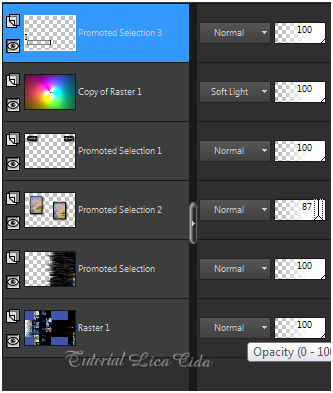
Down. _Layers\Blends\ Opacitys.
19- Copio a layer Raster1.
Image\ Canvas Size 950 x
750.
_ Selecione. Nova layer\
Edit Paste Into Selection
\ Selections\ Select
none.
20-Plugin MuRa's Meister \Perspective Tiling.
Default.
_Usar a ferramenta Pick Tool e descer o efeito ao back
do top.
21- Ativar a layer Promoted
Selection.
-Edit Copy nos decos: deco1lc \
deco2lc \ deco3lc\ Paste As New
Layer.
* No deco 2lc: Effects\ Image Effects\
Offset . H= 71 \ V=49 . Custom e
Transp.
22- Ativar a layer
superior.
_Edit Copy nos tubes:
naisemulheres150 e GG09~AfricanViolets_001\ Paste As New
Layer.
_Use a
gosto.
23-Image
add borderes 1 pxl \ cor mais escura (
#4e5d70).
_Image add borderes 40 pxls \ cor mais clara
(#819bb6).
Selecione
24-Plugin dsb flux\ Bright Noise... (
print ítem 6
).
Invert.
_Effects \ 3D
Effects \ Drop Shadow 0\ 0\
80\ 40,00. Color=000000.
_Selections\ Select
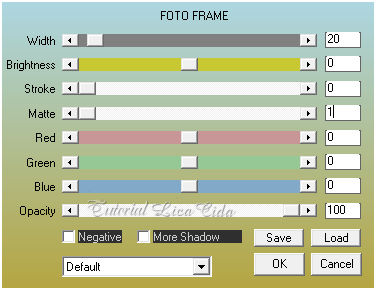
none. 25- Plugin \ AAA Frames
.
 Aplicar a Marca D'agua.
Assine e
salve. Aparecida \ licacida , abril de 2017.
Espero que gostem.
Obrigada!!
  |