|
|
|
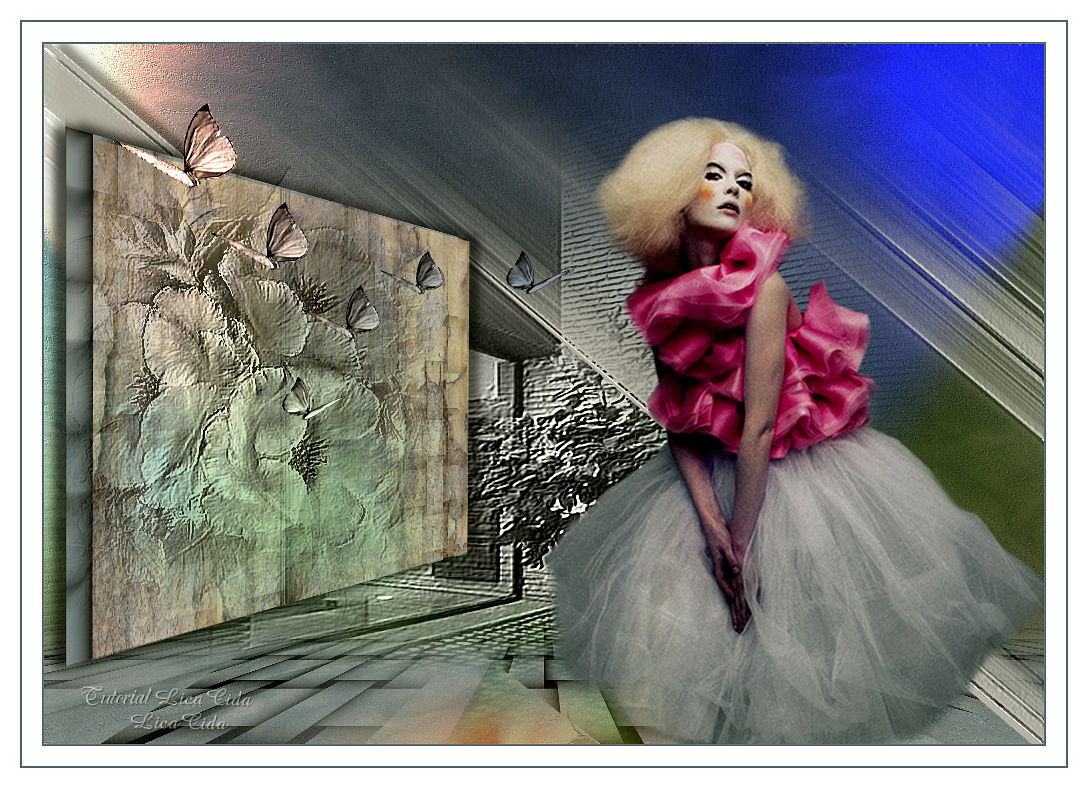
"Butterflies Welcome"
Preset Illumination\Lights_curves (mp) ( Guardar em sua pasta de Presets My PSP Files). Tubes: 4689-luzcristina
\4696-luzcristina \tube 4677 \tube borboletas ( sem autor\
arquivo net )
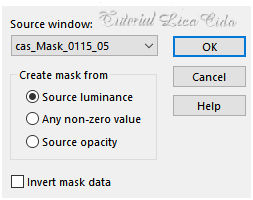
Mask: mask
cas_Mask_0115_05.
Elemento :elemento
andromeda
(Agradeço)
Marca D'água
. Efeitos do PSP.
Versão usada
PSPX8.
Plugins
Plugin MuRa's Meister
Cloud
Filters Unlimited 2.0 \
Distortion Filters _ Smelter 2
Plugin
Andromeda\ Perspective
Tutorial
_Roteiro
foreground= #63737c
\ background= #b0afad
1-Abrir nova imagem
transparente de 1000 x 700 pxls.
Plugin MuRa's Meister
Cloud_Default.
Layer\
Duplicate
2- Plugins <I.C.NET Software> Filters
Unlimited 2.0 \ Distortion Filters _ Smelter
2_Default.
Adjust \ Add/ Remove Noise_ JPGE
Artifactal Removal. Maximum\ 69.
Plugin FMTT\
Blend Emboss . Resize80%. Layer\
Duplicate
3-Effects\ Geometric Effects\
Skew.
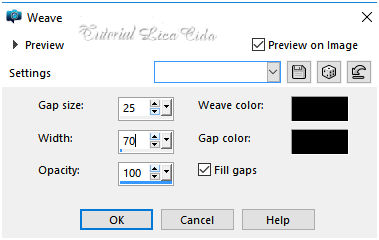
 Effects\ Texture Effects\
Wave
 Resize 80%. Layer\ Merge\
Merge Down.
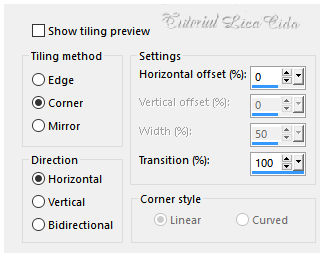
Effects\ Image Effects\ Seamless
Tiling: Default.
 Layer\
Duplicate
4-Plugin MuRa's Meister Perspective
Tiling...Heigh18 \ demais valores
default.
*Com a Ferramenta Magic Wand \ Feather 70 \ Clique na parte transparente .Deletar ( duas\tres vezes ,suavizar o efeito ). Selections \ Select none. Emboss3.
5-Ativar a Copy of
Raster1.
Plugin AAA frames\ Foto Frame...
Default.
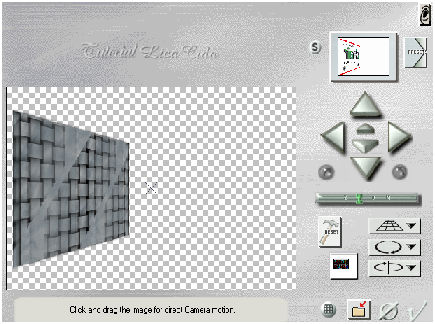
Plugin Andromeda\
Perspective...
 Effects\3D Effects\
Drop Shadow. ( menos) -2\ 12\ 60
\ 13,00 . (Color=#000000) .
Repetir: Effects\3D
Effects\ Drop Shadow. 2\ (menos) -12\ 60
\ 13,00 . (Color=#000000) .
6-Edit Copy no elemento
andromeda \Paste As New Layer. Posicione sobre o
efeito
7-Ativar a
layer superior ( copy (2) of raster1.
Nova layer \
preencher com a color do background (#b0afad
).
Aplicar a mask
cas_Mask_0115_05.
 Emboss 3 \ Layer\ Merge Group.
Image\ Mirror Horizontal.
Effects\3D Effects\ Drop
Shadow. 2\ (menos) -12\ 60 \ 13,00 . (Color=#000000) .
Layer Arrange Move Down. ( aplicar
tres vezes).
7- Ativar a Raster1. Nova
layer.
Sel All. Edit Copy no
tube 4689-luzcristina \ Edit Paste Into
Selection . Selections\ Select none.
Use a gosto.
Effects\ User Defined Filters\
Last Used. 8-Voltar a ativar a
Raster1.
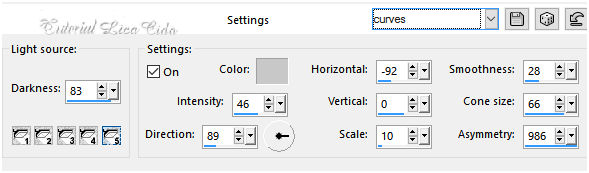
Effects\ Illumination Effects\ Preset Illumination\
Lights\ curves
 Layers\ Blends\
Opacitys
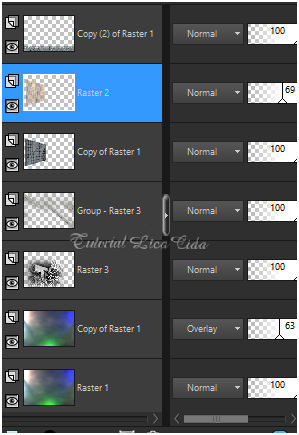 9-Ativar a layer superior.( copy (2) of
raster1).
Edit Copy no tube
4696-luzcristina \Paste As New Layer.\Resize
80%.Posicione.
Effects\ User Defined
Filters\ Last Used.
Opcional: Effects\ Illumination Effects\ Preset
Illumination\ Lights\
curves.
10-Edit Copy no
tube borboletas \Paste As New Layer. Posicione.
Effects\ User Defined
Filters\ Last Used. Posicione
.
Repetir: Effects\
Illumination Effects\ Preset Illumination\ Lights\
curves.
Effects\3D Effects\ Drop
Shadow. 2\ (menos) -12\ 60 \ 13,00 . (Color=#000000) .
11-Edit Copy no
tube 4677-luzcristinas \Paste As New Layer.
Posicione.
12- Image add
borderes 2 pxls color a gosto.
Aplicar a Marca D'agua.
Assine e
salve. Aparecida \ licacida , setembro de
2017.
Espero que gostem.
Obrigada!
  |