|
|
|
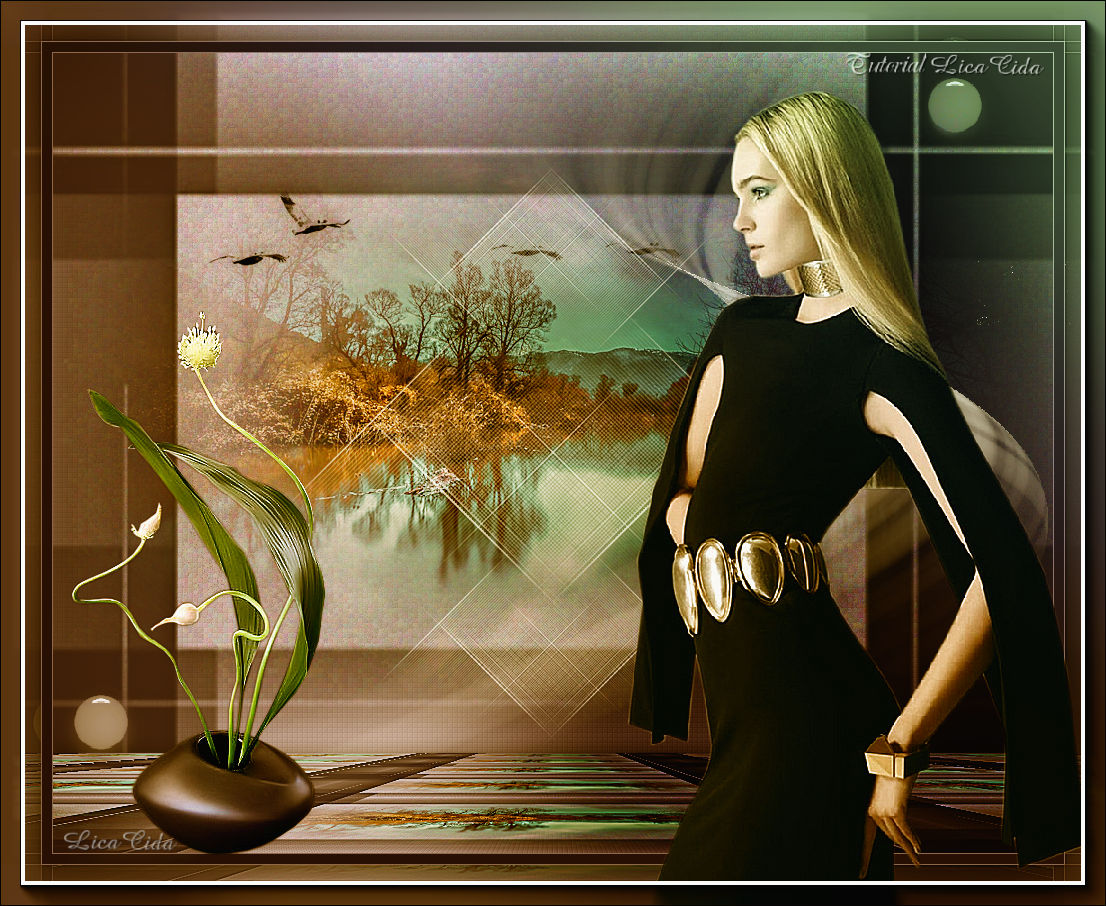
"Helena"
Tubes:
tube OBG_1340 \tube 256_paysage_p3_animabelle \ tube Gabry-fiori
83.
40-ave
( arquivo )
Deco
Nena \ Ildiko_Desings_Created@Deco (2 ).
Brush-Abstract Aura VI_11
*Agradeço.
Marca
D'água . Efeitos do PSP.
Versão usada PSPX8.
Plugins
Plugin
Xero.
Plugin
MuRa's Meister
Plugin
VanDerLee\ UnPlugged-x...
Plugin
AAA_Frame
Tutorial_Roteiro
Configurar :
foreground #8f89af \ background
#27253a.
1- Abrir uma nova imagem
transparente de 1000 x 700 pxls.
_Prencher com a color=#27253a ( background
).
2- Nova Layer
_Preencher color=#8f89af (
foreground ).
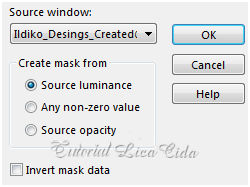
3-Aplicar a mask Ildiko_Desings_Created@Mask_&_di.
 _Layer\ Merge\ Group.
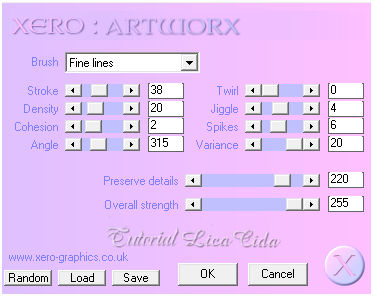
4-Plugin Xero \ Artworx.
 5-Plugin Xero\ Fritillary_Default.
 _Effects \ 3D Effects \ Drop Shadow 0\ 0\
60\ 30,00. Color=000000.
6-Edit Copy no tube
256_paysage_p3_animabelle\ Paste As New Layer.
_Posicione.
_Adjust\ Sharpness\
Sharpen More.
_Layer\ Merge\
Merge Visible.
_Edit Copy.
7- Image
\Canvas Size 1000 x 800 pxls. Bottom 100.
_Selecionar com a
ferramenta Magic Wand _Default , a parte transparente.
8-Nova
layer.
_Edit Paste Into
Selection.
_Plugin MuRa's
Meister \ Perspective Tiling _Default.
_Adjust\ Sharpness\
Sharpen More.
_Effects \ 3D
Effects \ Drop Shadow 0\ 0\ 60\
30,00. Color=000000.
_Selections\ Select
none.
9-Edit Copy 40 ave \ Paste As
New Layer. Posicione.
10-Edit Copy no deco Nena
\ Paste As New Layer.
_Adjust\ Sharpness\
Sharpen More.
11-Edit Copy Ildiko_Desings_Created@Deco (2 ) \ Paste As New
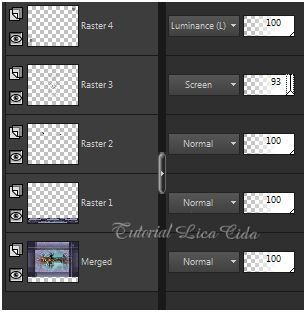
Layer.
_Layer
\Duplicate , posicione como modelo . Layer\ Merge\ Merge
down.
_Blend Mode=
Luminance (L).
Layers\ Blends\
Opacitys.
 12-Layers\ New
Adjustment Layer\ Curves...
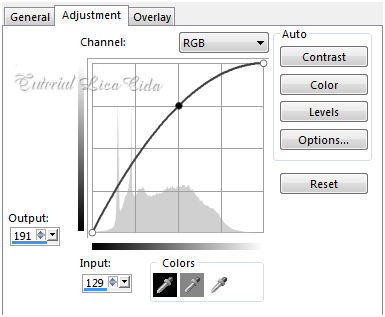 _ Renomear ( luz ). Pintar a layer de
preto ( #000000) .
13-Ativar a layer inferior
(Raster4 ) .
Repetir :
Layers\ New Adjustment Layer\ Curves... ( mudar valores
). 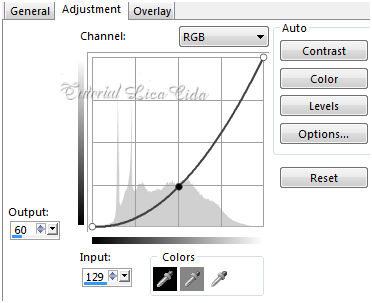 _Renomear ( shadow ) . Pintar a layer de
preto ( #000000) .
_Layer\ Arrange\ Move Up.
 *Usar
no foreground a color #ffffff.
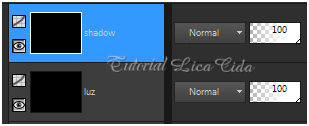
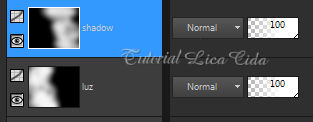
14-Ativar a layer luz.
_ Com a ferramenta Airbrush iluminar a parte
esquerda do back .
Configurar:
 _Adjust\
Blur\ Gaussian Blur... R=28,00.
15-Ativar
a layer shadow .
_ Com a
ferramenta Airbrush shadow na parte direita do
back.
_Adust\ Blur\
Gaussian Blur... R=28,00.
*Observar se o contraste está a
gosto!
_Layers
 16-Image \ Add Borders \1 pxl symmetric marcado. Color=
foreground #8f89af.
_Image \ Add Borders \10 pxls symmetric marcado. Color=
background #27253a.
_Image \ Add Borders \1 pxl symmetric marcado. Color=
foreground #8f89af.
_Edit
Copy.
17-Image \ Add Borders \40 pxls
symmetric marcado. Color= #ffffff.
_Selecione
_Edit Paste Into
Selection.
_Adjust\ Blur\ Gaussian Blur=28,00.
18-
Plugin VanDerLee\ UnPlugged-x... \ Defocus _Defocus6
. _Adjust\ Sharpness\ Sharpen More.
_Invert.
_Effects \ 3D
Effects \ Drop Shadow 0\ 0\ 60\
30,00. Color=000000.
_Selections\ Select
none. 19-Edit Copy Abstract Aura
VI_11 \ Paste As New Layer. Resize 80%.
20- Edit Copy no tube OBG_1340\Paste As
New Layer. Resize 90%. Posicione.
_Adjust\ Sharpness\ Sharpen More
21-Edit Copy no tube Gabry-fiori 83 \
Paste As New Layer. Posicione.
_Adjust\ Sharpness\ Sharpen More.
22-Image \ Add Borders \1 pxl symmetric marcado. Color=
foreground #8f89af.
23-
Plugin AAA_Frame\ Foto Frame.
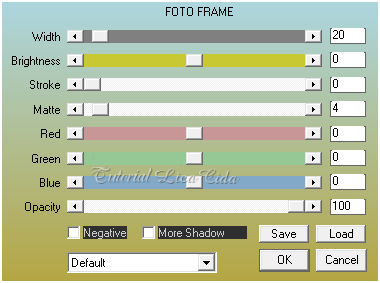  *Opcional
ou use a gosto.
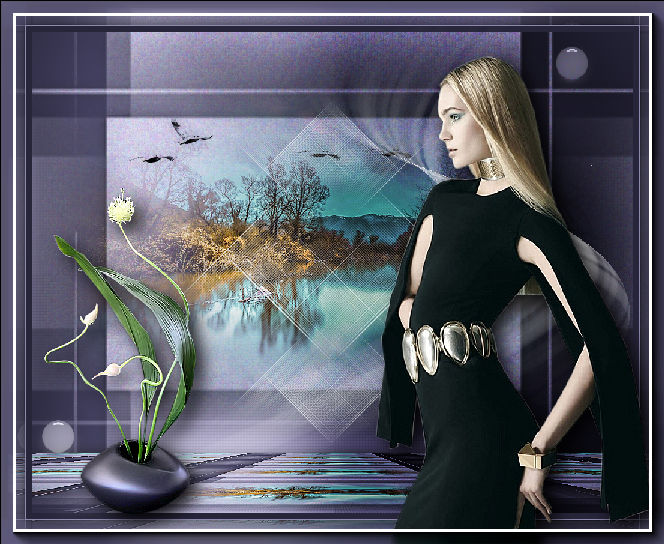
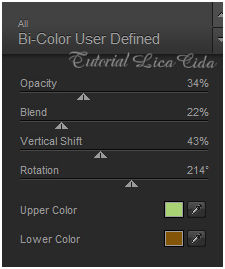
24-Plugin
Nick Software\ Color EfexPro 3.0\ Bi-Color User Defined.
Usei cores
contrastantes ( #a8d274 e #825508 ).
 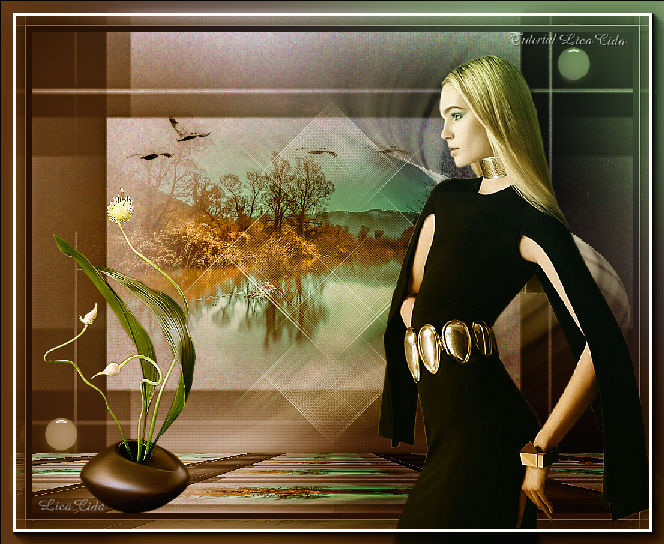 Aplicar a Marca
D'agua.
Assine e
salve.
Aparecida /
licacida, fevereiro de 2017.
Espero que
gostem.
Obrigada!  |