
|
|
|
" Without You "
Selecões: Imagem alpha
channel_lc - Seleção1 - Seleção2-
Seleção3.Seleção4.
(Guardadas em Canal Alfa a Imagem
)
Preset rouded
( arquivo net \darei os creditos se souber autor ) do Eye Candy
5/Impact/Glass.
(Dar duplo
clic sobre o preset para importar-lo ao
Plugin). Back: Ildiko_Design@Backgrounds
(2).
Mask:ildiko_design_mask_&_own_2016
(5).
Tubes:Femme-1847-Azalee\
262_paysage_p3_animabelle \ SvB Zwarte schaal met rode bloem.
(Agradeço)
Marca
D'água . Efeitos do PSP.
Versão usada PSPX8.
Plugins
Plugin
VanDerLee\ UnPlugged-x...
Plugin
VM Instant Art \ Tripolis.
Plugin
Toadies\ What Are You ?
Plugin
\Andrews Filter 7 \ Coloured Rise.
Plugin
Carolaine and Sensibility \ cs-texture.
Tutorial _Roteiro
1-Abrir alphachannel_lc, fazer uma cópia,
fechar ( minimizar ) a original.
_ Select All. Edit Copy no Ildiko_Design@Backgrounds
(2) \ Edit Paste Into Selection . Selections\ Select
none. _Layer Duplicate.
( *fechar a raster 1, vamos trabalhar na copy of
raster1 ). 2- Plugin VanDerLee\ UnPlugged-x...
(color=#000000 )
 3-Plugin VM Instant Art \
Tripolis..._Default.
_Effects\ Edge Effects\ Enhance
More. 4- Selection\ Load Selection from
Alpha Channel Selection #1.
_Promote Selection to Layer.
_Selections\ Select none. 5- Plugin Toadies\
What Are You ? ... 50 \ 0.
_Effects \Reflection
Effects \ Rotating Mirror . H = 0 \ R=
180 \
Repeat. 6- Plugin \Andrews Filter 7 \
Coloured Rise_Default.
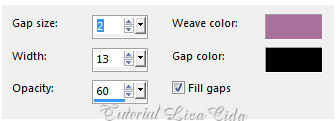
7- Effects\ Texture Effects\
Wave.
_Color= #aa709b e #000000 ( retiradas
do back
).
 8-
Ativar a copy of raster1.
_Selection\ Load Selection from Alpha Channel Selection
#2.
_Promote Selection to Layer. 9-Plugin Carolaine and
Sensibility \ cs-texture _Default.
_Selections\ Select
none.
10- Plugin Simple\
Blintz. _Effects
\Reflection Effects \ Rotating Mirror . H = 0 \
R= 180 \
Repeat.
11- Volto a
ativar a copy
of raster1.
_Repetir
:Selection\ Load Selection from Alpha Channel Selection
#2.
_Promote Selection to
Layer.
12- Plugin Alien Skin Eye Candy 5:
Impact\ Glass... Setting\ use Setting\
rouded.
_Selections\ Select
none.
_Effects
\Reflection Effects \ Rotating Mirror . H = 0 \
R= 180 \
Repeat.
13- Volto a
ativar a copy
of raster1.
_Selection\ Load
Selection from Alpha Channel Selection
#3.
_Promote
Selection to
Layer.
_REPETIR: Plugin Alien Skin Eye
Candy 5: Impact\ Glass... Setting\ use Setting\
rouded.
_Selections\
Select
none.
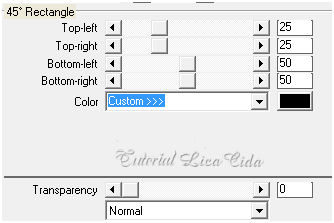
_Layer\ Arrange \
Bring to
Top.
_Efects\ Image
Effects\ Offset... H= 4 \V= 0 . Custom e
Transp.
*Layer Duplicate.
Resize 50% (mais )
\70%.
_Efects\ Image
Effects\ Offset... H= 4 \V= (menos) -87 . Custom
e
Transp.
_Layer\ Merge\
Merge
Down. 14-Nova
layer.
_ Preencher com a
color=#000000.
_Aplicar a mask
ildiko_design_mask_&_own_2016
(5). 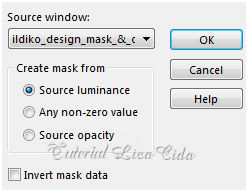 _Layer\ Merge\ Group.
_Adjust\ Sharpness\ Sharpen
More.
15-Image\ Canvas Sise 950
x 700 _Bottom 100.
_Nova Layer\Send to
Bottom.
_ Preencher com o gradiente formado pelas
cores escolhidas para texture : #aa709b e #000000 ( retiradas do
back ).
Configurar Sunburst
: Repeats 0. Invert desmarcado. CP=
H e V 50 \ FP=H e V 50.
 _Adjust\ Add/
Remove Noise \ JPEG Artifactal Removal... ( Maximum\ C=80) .
_Plugin FMTT\ Blend
Emboss.
**Ativar a Raster1 e deletar a copy of
raster1.
16- (
Estou na Raster1 )
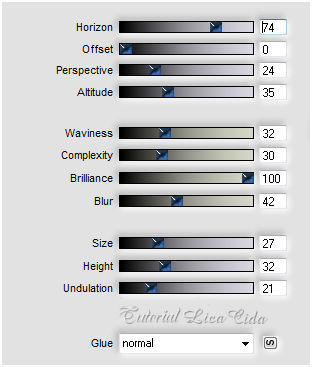
_Plugin MuRa's Meister \Perspective Tiling.
Height 20 \ outros valores_Default.
*Com a Ferramenta Magic Wand \ Feather 70 \ Clique na parte transparente . Deletar ( quatro\ cinco vezes , suavizar o efeito ). Selections \ Select none. _Emboss3.
17-
Ativar a Group_Raster2 ( layer da mask )
_ Plugin Flaming Pear\ Flood.
18- Edit Copy
no 262_paysage_p3_animabelle\ Paste As New Layer. Resize
80%.
_Effects\ Image Effects\ Seamless Tiling: *Side by side.
19-Selection\
Load Selection from Alpha Channel Selection #4.
Deletar.
_Selections \ Select
none.
_Adjust\ Sharpness\ Sharpen More.
* usar
essa layer acima da Raster1, opacity a gosto.
_Layer\ Blends\ Opacitys.
 20-Duplicar a Raster2 \ Layer\ Arrange \ Bring to Top. _Opacity 20 %. Blend Mode= Overley. 21- Image add border 1 pxl cor #000000. _Image
add border 1 pxl color=#aa709b.
_Image
add border 1 pxl color=#000000.
_Edit
Copy.
_Image
add border 40 pxls cor #ffffff.
_Selecionar. Edit Paste Into Selection
.
_Adjust\ Blur\ Gaussian Blur. R=30,00.
_Plugin Graphics Pluss\ Cross Shadow._Default.
Invert . _Effects \ 3D Effects \ Drop Shadow 0\ 0\ 80\ 40,00. Color=000000. _Selections\ Select
none. 22- Adjust\ One Step PhotoFix. *Plugin AAA Filters\ Custom_Landscape . (opcional) 23-Edit Copy no tube Femme-1847-Azalee \Paste As New Layer. Resize 78%. _Posicione. Adjust\ Sharpness\ Sharpen . 24-Edit Copy no SvB Zwarte schaal met rode bloem \Paste As New Layer. Resize 60%. _Posicione. Adjust\ Sharpness\ Sharpen More. _ Image add
border 1 pxl cor #000000.
Aplicar a Marca D'agua.
Assine e
salve. Aparecida \ licacida , fevereiro de
2017.
Espero que gostem.
Obrigada!!   |