 Versões
Amigas
"Line Art" Script
_ 13 Comic Line Art \ do próprio psp Guardar em sua pasta
de Scripts Restricted .
Seleção_ lasel1lc\ lasel2lc\ lasel3lc .
Salve em sua pasta de seleções My PSP Files.
Mask: Narah_mask_0722 Tube: Gabry-woman 731\
calguismistedroad09062012\Flower_886826.
Background : HG-Flechten
\backcristallc.
Deco:
ladeco1lc \ ladeco2lc \ladeco3lc (2\3)
Brush:
brush 14
Marca
D'água. Efeitos do PSP.
Versão usada PSPX7
Plugins
Plugin L e K's\ Paris , Zitah.
Plugin Simple \ Pizza Slice
Mirror.
Plugin dsb flux \ Linear
Transmission.
Plugin MuRa's Meister \ Perspective
Tiling.
Plugin Adjust\
Variations. Tutorial _Roteiro
_Retirar duas cores do Background HG-Flechten
anexado.
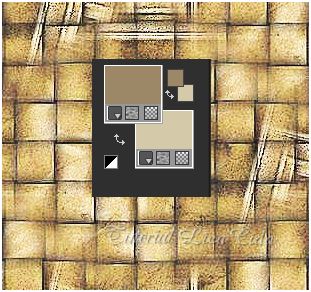
Foreground= #9c8867\ Background=
#d4c9a9.

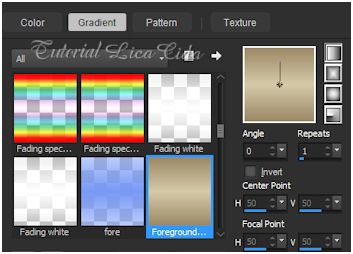
 1-Abrir uma nova imagem transparente 950
x 650 pxls. Preencher com o gradiente formado
pelas cores escolhidas acima. Configurar Linear A=0 \ R=1\ Invert
desmarcado.
 2-Plugin L e K's\ Paris_Default.
3-Plugin L e K's\ Zitah.
 _Adjust\ Sharpness\
Sharpen.
4-New
Layer . Select All. Copy no Background HG-Flechten \ Edit
Paste Into Selection. Selections\ Select none.
_Adjust\ Blur\ Gaussian Blur. R= 8. B.Mode= Luminance (
L ).
5-New
Mask Layer\ From Image...
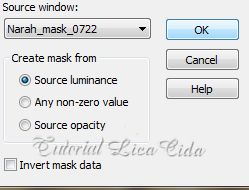 _Emboss 3.
_Layer \ Merge \ Merge
Group.
6- Correr o Script "
13 Comic Line Art "
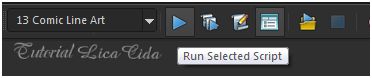 *Procurar o script "13 Comic Line
Art "
* Clique para corrê-lo em Run
Selected Script . _Image\Flip ( mirror vertical ).
7-Plugin Simple \ Pizza Slice
Mirror.
_Effects\ Reflection Effects \ Rotating Mirror. H= 0 \
A= 0\ Reflect.
_Adjust\ Sharpness\
Sharpen.
*Effects \ 3D Effects \ Drop
Shadow 0\ 0\ 62\ 29,00. Color=#000000 .
8-Selections\ Load \ Save Selection \
Load Selection From Disk \ Load \lasel1lc.
_Ativar a Raster1. Promote Selection to Layer . Layer\ Arrange
Bring To Top.
_Selections \ Select None.
9-Plugin dsb flux \ Linear Transmission.
1\4\45_ Horizontal.
*Effects \ 3D Effects \ Drop
Shadow 1\ 1\ 100\ 1,00. Color=#000000 .
_Layer\Duplicate. Image Mirror ( mirror
horizontal ). Layer\Merge\Merge Down.
_Layer
\Duplicate\ Image \ Flip ( mirror vertical ) Layer\Merge\Merge
Down.
*Effects \ 3D Effects \ Drop
Shadow 0\ 0\ 62\ 29,00. Color=#000000 .
10-Selections \Load \ Save Selection \
Load Selection From Disk \ Load \lasel2lc.
_Ativar a Raster1. Promote Selection to Layer. Layer\ Arrange\ Move
Up.
*Effects \ 3D Effects \ Drop
Shadow 1\ 1\ 100\ 1,00. Color=#000000 e
negativo.
11- Selections\ Modify\ Contract 15
pxls. Effects \ 3D
Effects \ Drop Shadow 1\ 1\ 100\ 1,00. Color=#000000
e negativo.
12-Selections\ Modify\ Contract 15
pxls . Effects \
3D Effects \ Drop Shadow 1\ 1\ 100\ 1,00.
Color=#000000 e negativo.
Selections\ Select none.
_Layer\Duplicate. Image Mirror ( mirror
horizontal ). Layer\Merge\Merge Down.
*Effects \ 3D Effects \ Drop
Shadow 0\ 0\ 62\ 29,00. Color=#000000 .
13-Selections \Load \ Save Selection \
Load Selection From Disk \ Load \lasel3lc.
_ Copy no tube paisagem
calguismistedroad09062012\ Paste As New Layer. ( Resize e
posicionamento_ ajuste nos quadrinhos ).
_Selections \ Invert. Delete.
Selections\ Select none.
_ O mesmo drop shadow usado acima. Layer\Merge\Merge
Down.
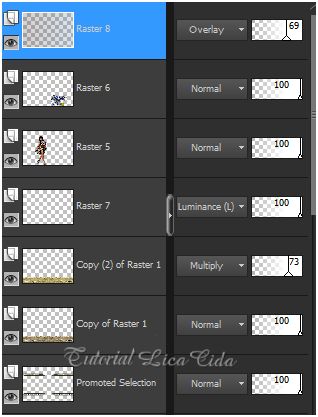
Layers
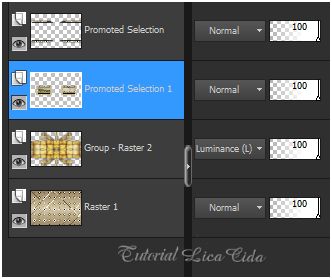 14-Ativar a Group-Raster2.
_ Copy no ladeco1lc\ Paste As New Layer.
_ Copy no ladeco2lc\ Paste As New Layer.
_ Copy no ladeco3lc\ Paste As New Layer.
_ Effects \ Image Effects \Offset:
H= 0 V= 123. Custom e Transparent
marcados.
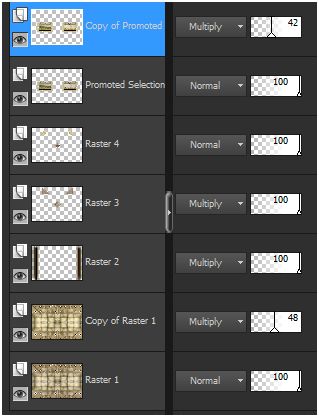
15-Ativar a Group-Raster2. Layer\Merge\Merge
Down. Layer\
Duplicate.
_Plugin MuRa's Meister \ Perspective
Tiling.
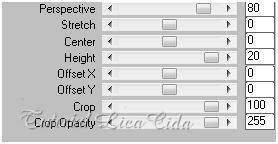
_Adjust\ Sharpness\ Sharpen. Layers\ Arrange\ Bring To
top.
Layers
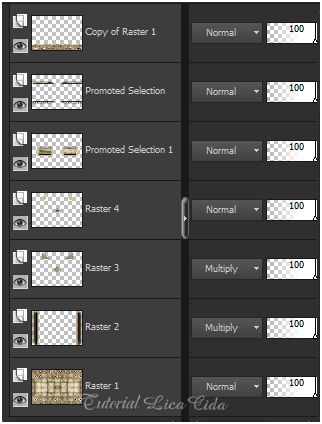
16- Copy no tube Gabry-woman 731\ Paste As New Layer. Resize e
posicionamento.
17- Copy no tube Flower_886826 ( raster4) \ Paste As New
Layer. Usar a gosto.
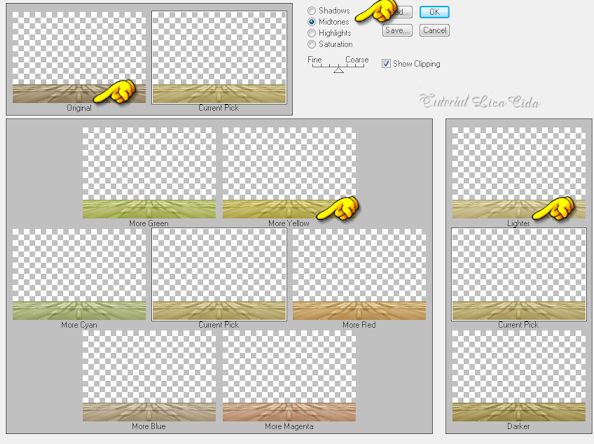
18- Duplicar a Raster1. Plugin Adjust\
Variations.
Highlights_marcado \ Original ( as opções de acordo com as cores
usadas )
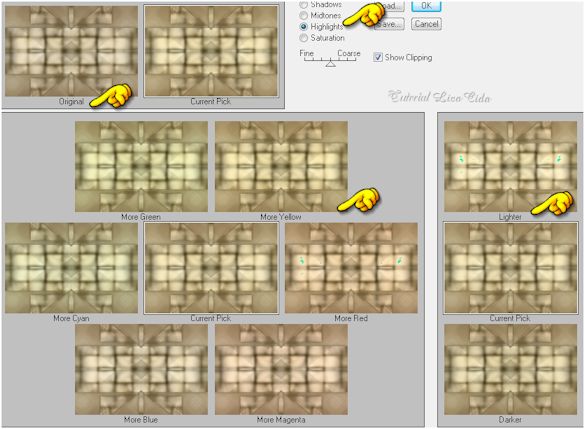
19- Duplicar a Copy of Raster1.
Midtones_marcado \ Original ( as opções de acordo
com as cores usadas ).
20- Ativar a Copy (2) of Raster1 _ Copy no brush14\ Paste As New Layer. Posicione a gosto. 21-Ativar Raster6 _ Copy no cristallc\ Paste As New Layer. Layers\Blends\Opacitys. 22-Image \ Add Borders \1 pxl symmetric
marcado. Color=#9c8867.
23-Image \ Add Borders \40 pxls
symmetric marcado. Color=#d4c9a9. Selecione. Selection\ Invert.
*Effects \ 3D Effects \ Drop Shadow 0\ 0\ 62\ 29,00.
Color=#000000 . Selections\ Select none.
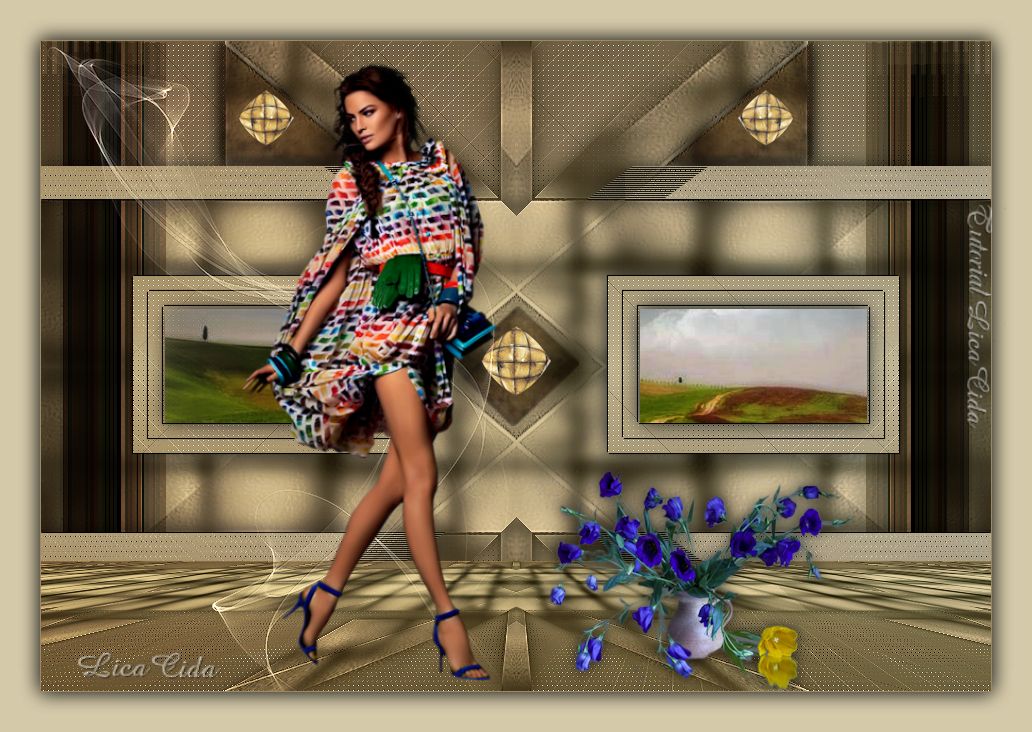
Aplicar a Marca D'agua.
Assine
e salve.
Espero
que gostem. Aparecida
/ licacida, abril de
2015. 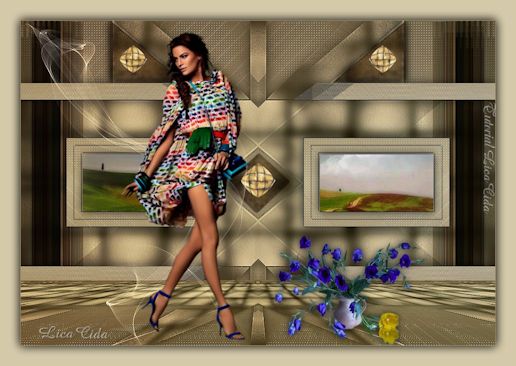  |