|
|
|
|
|
Tag
Quietude
Dedico a
amiga Monique com carinho !!
Tubes:
Chouchoucats82's Tubes_Nikki Reed005 \ Grisi_Misted_Land_344
Tubé par
Valérie : VBM FOND4 .
Elementos: elemento3lc e
elemento4lc-arquivonet. Back: back 5-rb _Regina Barbeiro.
Marca
D'água. Efeitos
do PSP.
Versão
usada PSPX6 Plugins
Plugin
Mehdi\Sorting Tiles..., Weaver,
Plugin VM
Toolbox\ Instant Tile, Tiler, Blast .
Plugin
MuRa's Seamless\ Mirror Diagonal
Plugin Flaming Pear \
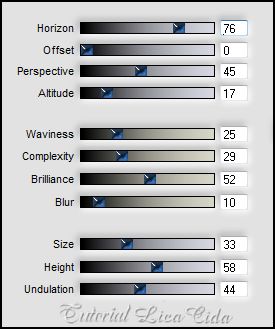
Flood.
Roteiro_Tutorial
1-Abrir uma nova imagem transparente 900x600. Select all \ Edit copy no back Cadre1 VBMFOND4\ Edit Paste Into Selection . Selections \ Select none.
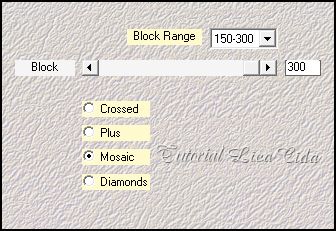
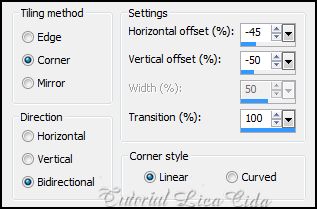
2-Plugin Mehdi\Sorting Tiles...
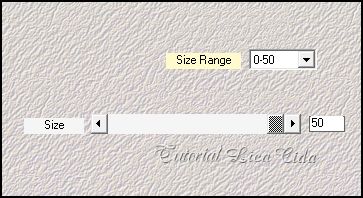
3-Plugin Mehdi\Weaver.
4-Plugin VM Toolbox\ Instant Tile_Default ( 77\31). Adjust\Sharpness\Sharpen More. Repete.
5-Edit copy no back Copie de Cadre1 VBMFOND4\ Paste As New Layer.
6-Ativar a Ferramenta Selection \ Rectangle . Ou tecla S. Em Custom selection configurar
.
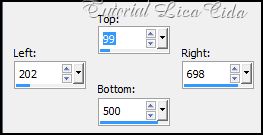 Promote Selection to Layer. Fechar esta layer (Promoted Selection ).
7-Ativar a Raster2 . Delete. Selection\ Invert. Effects \Artistic Effects\ Chrome.
Emboss3 . Adjust\Sharpness\Sharpen More. Adjust\ Hue and Saturation\ Colorize...35\136 ( usar o melhor tom para tua tag) . Selections \ Select none.
8-Ativar a Raster1 . Copy no tube Grisi_Misted_Land_344 \ Paste As New Layer.
9- Abrir e ativar a layer Promoted Selection . Deletar .
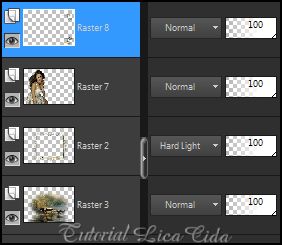
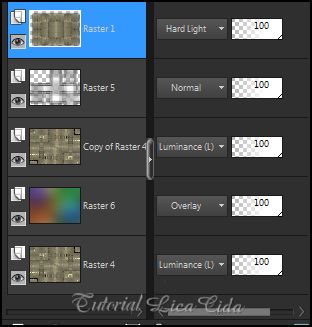
LAYERS
10-Image\
Canvas Size \ 1000 x 700 .
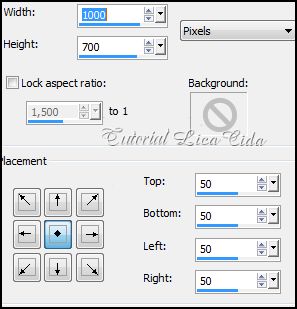 New Layer . Arrange\Send to Botton.
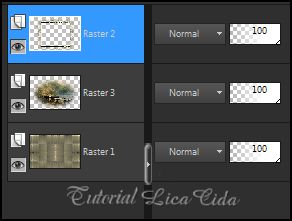
11-Ativar a Raster1 . Edit Copy .
12-Ativar a Raster 4. Select all \ Edit Paste Into Selection . Selections \ Select none.
13-Ativar a Raster1 . Effects \ 3D Effects \ Drop Shadow: 0\0\80\50,00. Color= 000000 . Repetir.
14-Ativar a Raster4 (( fechar as layers superiores )). Plugin VM Toolbox\Tiler.
15-Plugin MuRa's Seamless\ Mirror Diagonal...216. Adjust\Sharpness\Sharpen More. Repete.
16-Edit Copy no elemento3lc\Paste As New Layer. Plugin MuRa's Seamless\ Mirror Diagonal...216. Effects \ Image Effects \ Seamless Tiling .
Effects \ 3D Effects \ Drop Shadow: 10 \ 5 \ 65 \ 10,00 . Color= 000000 . Repetir H (menos) -10 e V ( menos ) -5 (( negativos. 17-Ativar as layers superiores. Na Layer Raster 3 ( layer da paisagem). Plugin Flaming Pear \ Flood.
18-Ativar a Raster4 . Layers\ Duplicate. New Layer . Layers\ Arrange\ Move Down. 19-Select all \ Edit copy no back 5-rb_Regina Barbeiro . Edit Paste Into Selection . Selections \ Select none. 20-Ativar a layer superior\Raster2 . Edit Copy no tube Chouchoucats82's Tubes_Nikki Reed005\ Paste As New Layer. Resize necessario. Posicione. 21-Edit Copy no elemento4lc-arquivonet\Paste As New Layer. Posicione.
22-Image\Add Borders\1 pxl marcado. Color=#000000. Edit Copy . Image\Add Borders\40 pxls marcado. Color=#ffffff . Selecionar. 23-Edit Paste Into Selection . Adjust\ Blur\ Gaussian Blur R=30,00. Adjust\ Add \ Remove Noise\Add Noise... S= Randon \ N=8 \ Monochrome ((marcado)). 24-Plugin VM Toolbox\Blast 176. 25-Selections \ Invert. Effects \ 3D Effects \ Drop Shadow: 0\0\80\50,00. Color= 000000 . Repetir. Selections \ Select none. Aplicar a Marca
D'agua.
Assine e salve em
JPG.
Espero que gostem e
aprovem .
Rio de Janeiro ,
Novembro de 2013.
Aparecida/Licacida
|