|
" Trudy "
Material Aqui
Script_ mover1mara_Guardar em sua paste de Scripts Restricted.
Script_ smudgemara1_Guardar em sua paste de Scripts Restricted.
*Dica: instale e feche o PSP , ele vai reconhecer os scripts .
( caso não instale segue em anexo)
Tubes :031PaisagemByPqnaAlice\ 679MulherByPqnaAlice\ Callitubes-248flores
Scripts rodados: scriptrodado_ mover1mara\ scriptrodado_
smudgemara1.
Decor: decokaleidoscope_.bylc\ tracostrudy
Título:Titulobylicacida
(Agradeço)
Marca D'água .
Efeitos do PSP.
Plugins
Opcional_Plugin Knoll Lens Flare Pro .
(Caso não conheça o plugin )
Instale a primeira pasta nos plugins não executáveis( Knoll Light
Factory 2)
Pegue o registro (registratienummer.txt ), copie , minimize e
instale ( Knoll LF2.0.1 Photoshop Only.exe).
Feche o psp, ele vai reconhecer o plugin_ espero ter ajudado. O
Plugin encontra-se nos materiais da tag flare ( endereço abaixo)
:::...TAG FLARE...::: (meumundonopsp.com)
Plugins \ ScreenWorks \ Chain Link.
Plugins \ Alien Skin Eye Candy 5 _ Impact \ Glass
Plugins Graphics Plus\ Cross
Plugins MuRa's Meister\Cópies.
Plugins AAA Filters _ Custom
Tutorial
Abrir o material no PSP, duplique e feche os originais.
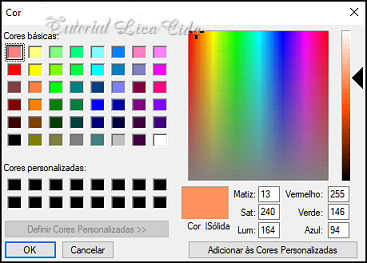
Escolha duas cores para trabalhar.
Configurar:
foreground #282116_ background #8b7149.
1-Abrir nova imagem transparente de 1024 x 800 , pintar com um
gradiente rectangular , Angle 0 \ Repeats 10 _ Invert marcado.
CP_V e H _50 \ FP_V e H_50 .Usar as cores configuradas acima.
2- Effects\ Geometric Effects\ Perspective- Horizontal.
D: 85 , Transparent.
3- Edit \ Repeat : Effects\ Geometric Effects\ Perspective-
Horizontal.
D: ( menos) -85 , Transparent.
4-Effects\ Image Effects\ Offset. H =0 \V= 150 ( custom )
Transparent.
_Layers Duplicate. Image Mirror Vertical
5-Effects\ Distortion Effects\ Polar Coordinates_Rectangular to
polar\Wrap.
6- Correr o Script "mover1mara"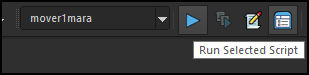
*Procurar o
Script "mover1mara".
*Clique para corrê-lo em _Run Selected Script.
7- Layer inferior_Raster1.
_Objects\Align\ Bottom.
8- Correr o Script "smudgemara1"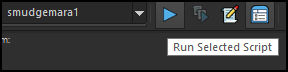
*Procurar o
Script "smudgemara1"
*Clique para corrê-lo em _Run Selected Script.
9-Ativar a layer superior.
_Com a ferramenta Magic Wand, Tolerance e Feather 0, selecionar o
centro do círculo.
10-Selections \ Modify \ Select Selection Borders.
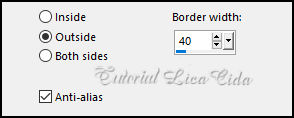
_Promote
Selection to Layer.
11-Plugins \ ScreenWorks \ Chain Link.
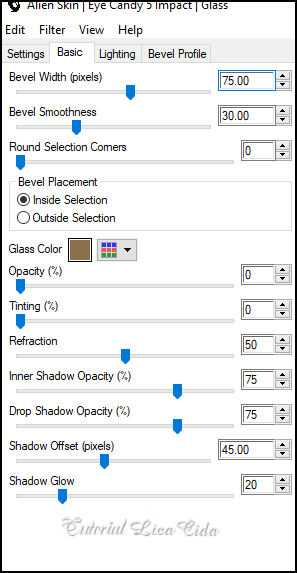
12- Plugins \ Alien Skin Eye Candy 5 _ Impact \ Glass_ Basic:
color #8b7149.
Selections\
Select none.
_ Layers\ Merge Down.
13-Layers \ New Raster Layer.
_Pintar com o gradiente rectangular formado acima , mudar: Angle 0 \
Repeats 0 _ Invert marcado.
_Layers\ Arrange\ Send to Bottom.
14-Plugins \ ScreenWorks \ Chain Link.
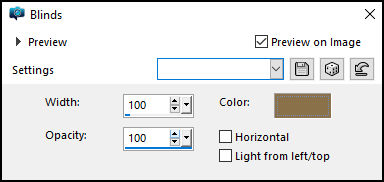
15- Effects\ Texture Effects\ Blinds.
color# 8b7149.
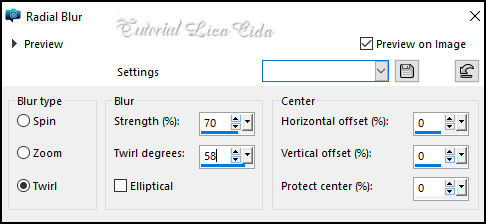
16-Adjust \Blur
\Radial Blur.
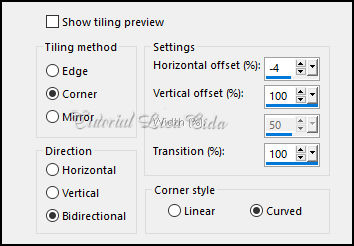
17-Effects \
Image Effects \ Seamless Tiling.
_Adjust \
Sharpness \ Sharpen More.
18- Plugins Graphics Plus\ Cross Shadow_Default.
19-Ativar a layer superior _Raster1.
*Plugin Alien Skin Eye Candy 5 : Impact\ Perspective Shadow_use a
gosto.
20-Edit Copy no tracostrudy \Paste As New Layer.
_Layers\ Arrange\ Move Down.
21 - Volto à Raster1.
_Edit \ Copy no Misted Paisagem ( 031PaisagemByPqnaAlice) \ Edit \
Paste As New Layer.
_Posicione. Resize se for necessário.
Adjust \ Sharpness \ Sharpen.
22- Edit Copy no decokaleidoscope_.bylc\ Paste As New Layer.
_ Tecle K para ativar a Feramenta Pick Tool .
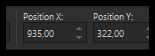 Position: X
935,00 \ Position: Y 322,00. Tecle M para desativar a Ferramenta. Position: X
935,00 \ Position: Y 322,00. Tecle M para desativar a Ferramenta.
Layers Duplicate
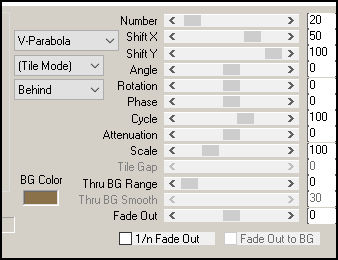
23-Plugins MuRa's Meister\Cópies.
Throw
Layers\ Merge\
Merge Down.
Layers Duplicate
Layers\ Merge\ Merge Down.
*Plugin Alien Skin Eye Candy 5 : Impact\ Perspective Shadow_use a
gosto.
Layers Organizar

24- Layer Copy
of Raster1 ( topo)
_ Edit \ Copy Special \ Copy Merged.
Image \ Add Borders \ 1 pxl color #escura
Image \ Add Borders \ 3 pxls color#clara
Image \ Add Borders \ 1 pxl color #escura
Selections \ Select All.
Image \ Add Borders \ 50 pxls color#ffffff . Selections \ Invert .
Edit \ Paste Into Selection.
Adjust \Blur \Radial Blur ( print ítem 16) . Plugins \ ScreenWorks \
Chain Link. Selections \ Invert.
Effects \ 3D Effects \ Drop shadow: 0\ 0\ 100\ 50,00. Color:
#000000.
Selections\ Select none.
25- Edit 679MulherByPqnaAlice\Paste As New Layer.
Resize 120 % Posicione. Posicione.
*Plugin Alien Skin Eye Candy 5 : Impact\ Perspective Shadow_use a
gosto.
26- Edit Copy no Callitubes-248flores\Paste As New Layer.
Posicione.
*Plugin Alien Skin Eye Candy 5 : Impact\ Perspective Shadow_use a
gosto.
27-Edit Copy no Titulo_bylc\ Paste As New Layer.
Posicione.
layers merge visible.
28- Plugins AAA Filters _ Custom\ Sharp \\repetir //Grain.
29-Opcional _ Plugin Knoll Lens Flare Pro .
Clique em color para escolher a cor.
Clique em Flare
Style para posicionar o Flare .
*pouse o mause sobre o efeito e use onde desejar.
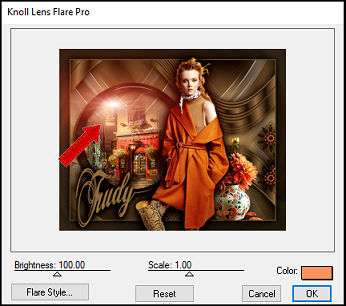
Image \ Add
Borders \ 1 pxl color #escura
Image \ Add Borders \ 3 pxls color#clara
Image \ Add Borders \ 1 pxl color #escura
Aplicar a Marca D'agua.
Assine e salve.
Resize _Width 1024 pxls.
Aparecida \ licacida , outubro de 2022.
Espero que apreciem.
Obrigada!

:::...VOLTAR...:::
|