" Intemporel
\ Atemporal"
Preset_ SmudgeBrush_ajustepaisagem.PspScript _mp.
( Guardar em sua pasta de Presets My PSP Files).
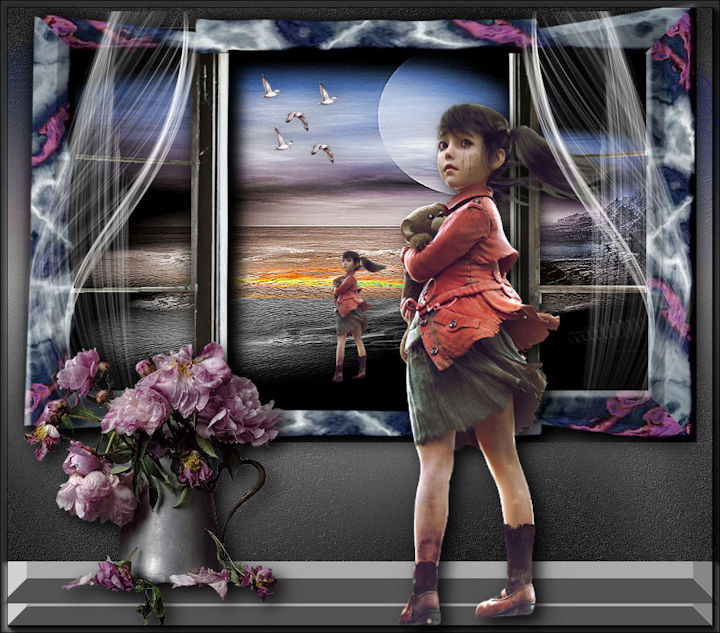
Tubes : Renee_TUBES_
23Guerre \ Renee-TUBES_Janvier-2021-35 \ janela( na
medida) \
nicole-deco-2014
Imagem:arquivo net \
deep_storm_by_night_fate_stock-d3hwvmd
Decor: 1223222279_gifs_animaux
_aves.
Abstract_Brushes_vol_2_by_Kahir44_3.
(Agradeço)
Marca D'água .
Efeitos do PSP.
Versão usada PSPX9.
Plugins
Plugin Graphics
Plus
Frames Textured
Plugin Flaming Pear
Tutorial
1-Abrir uma nova imagem transparente de 1024
x 800 .
Preencher com o gradiente formado pelas cores #444444 e
#aaaaaa. Configurar Linear . Angle 0 e Repeats 1.Invert
desmarcado.
2-Plugin Graphics Plus\ Cross Shadow.
_Adjust\ Add _Remove Noise\ JPEG Artifact
Removal ... Maximum \ 80 .
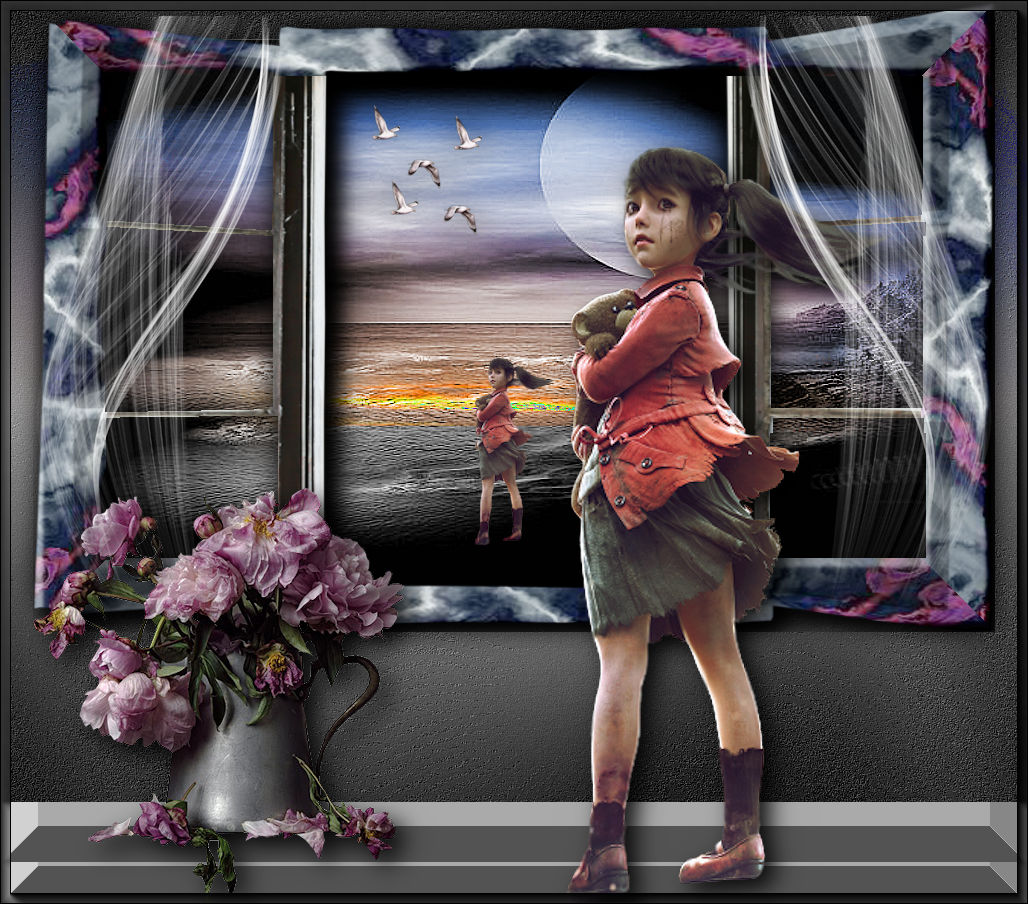
_Plugin FMTT\ Blend Emboss. 3-Edit Copy no Renee-TUBES_Janvier-2021-35 \ Paste As New Layer. ( segue a janela no tamanho que usei , fica a gosto) 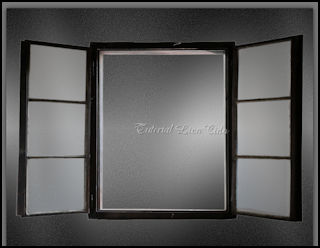
_Objects\ Align\Top.
4-Unlimited2 \ Frames Textured _Textured Frame 10 60\128\128\128 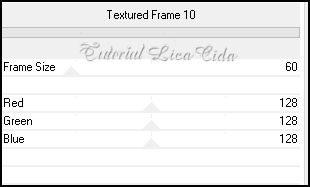
*Plugin Alien Skin Eye Candy 5 : Impact\
Perspective Shadow_Blurry.
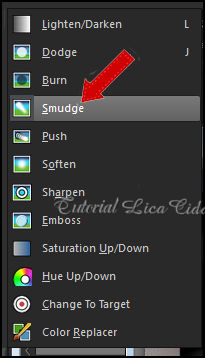
5- Selecione a ferramenta Freehand Selection_Default. 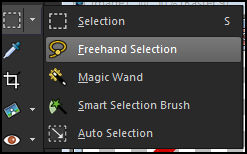 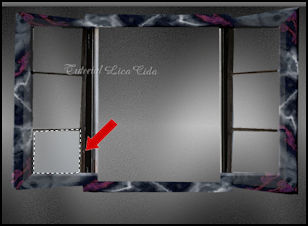 Selecione como indico no print\ delete (
selections\ select none.). Observe que os outros
Selecione como indico no print\ delete (
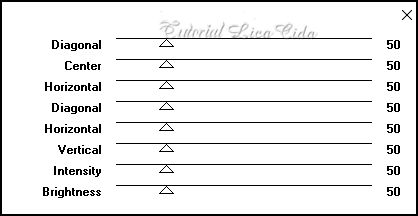
selections\ select none.). Observe que os outrosespaços ja foram deletados. _Effects\3D Effects\ Drop Shadow 0\ 0\ 70\ 50,00 . Color=#000000. 6-Selecione como print.Ocupar a parte vasada da janela. 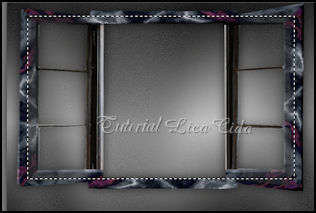
7-New Layer.
Edit Copy no arquivo net misted \ Edit Paste Into Selection . Selections\ Select none. _Layers\ Arrange\ Move Down. _Adjust \ Sharpness\ Sharpen More. 8-Edit Copy no deep_storm_by_night_fate_stock-d3hwvmd \ Paste As New Layer.
Resize 50%
_Objects\ Align\Top.
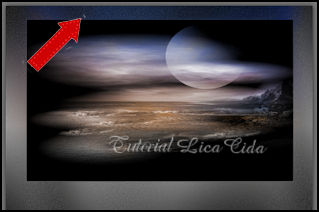
Deverá ficar assim. Acerte com a ferramenta Pick. ( feche a layer raster2-janela) 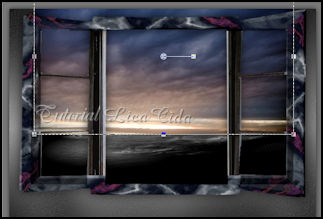
9- Estou na raster4.
Plugin Flaming Pear \ Melancholytron 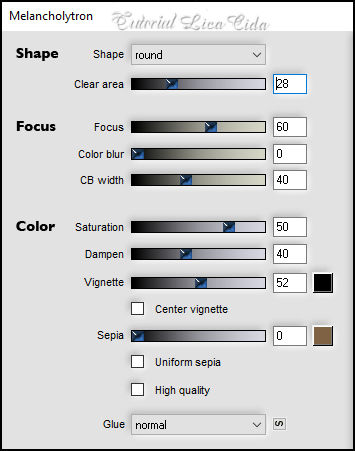
10-Ativar a ferramenta
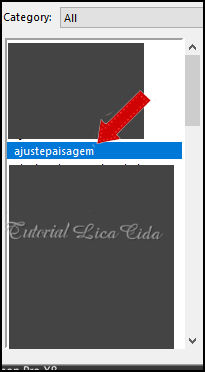
_Procurar o preset ajustepaisagem
_Ajuste a paisagem nas laterais . Mude o
Blende Mode = Color . Onde a seta indica, selecione e delete
(Selections\ Select none ).
_Abra a Raster 2 .( Layers\ Duplicate _ layer da janela) 11-Layers\ New Adjustment Layer\ White Balance. 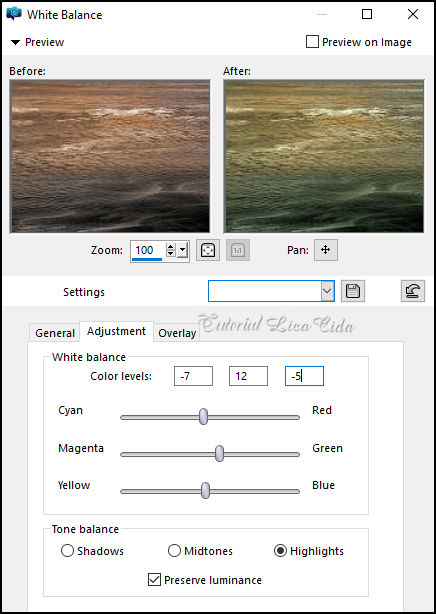
_Blende Mode=Screen. Opacity 69% .
Layers\ Merge\ Down 12-Raster4. _Edit Copy 1223222279_gifs_animaux \ Paste As New Layer. Posicione. 13-Voltar a layer duplicada( janela) \ Copy of Raster2. _Layers\ New Adjustment Layer_Fill Light\ Clarity. 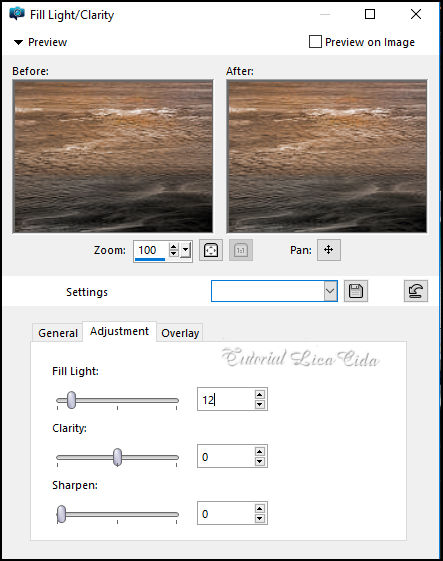
_Blende Mode=Screen. Opacity 46% .
Layers\ Merge\ Down. layers\blends\opacitys 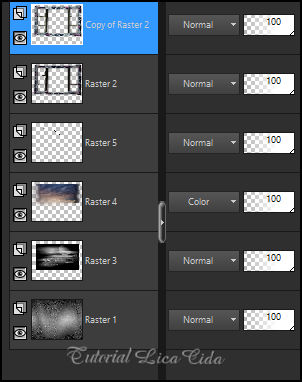
19-Edit Copy Renee_TUBES_ 23Guerre \ Paste As
New Layer.
Posicione. 20-Edit Copy nicole-deco-2014\ Paste As New Layer. Posicione. 21-Aplicar como cortina o Abstract_Brushes_vol_2_by_Kahir44_3, suavemente...observe modelo. Usar uma mask gradiente para dar acabamento. 22-Image \ Add Borders \ 2 pxls color =foreground. 23-AAA Frames\ Foto Frame.Width10_restante default. Aplicar a Marca D'agua. Assine e salve. Aparecida \ licacida , julho de 2021. Espero que gostem. Obrigada!
 |