|
|
|
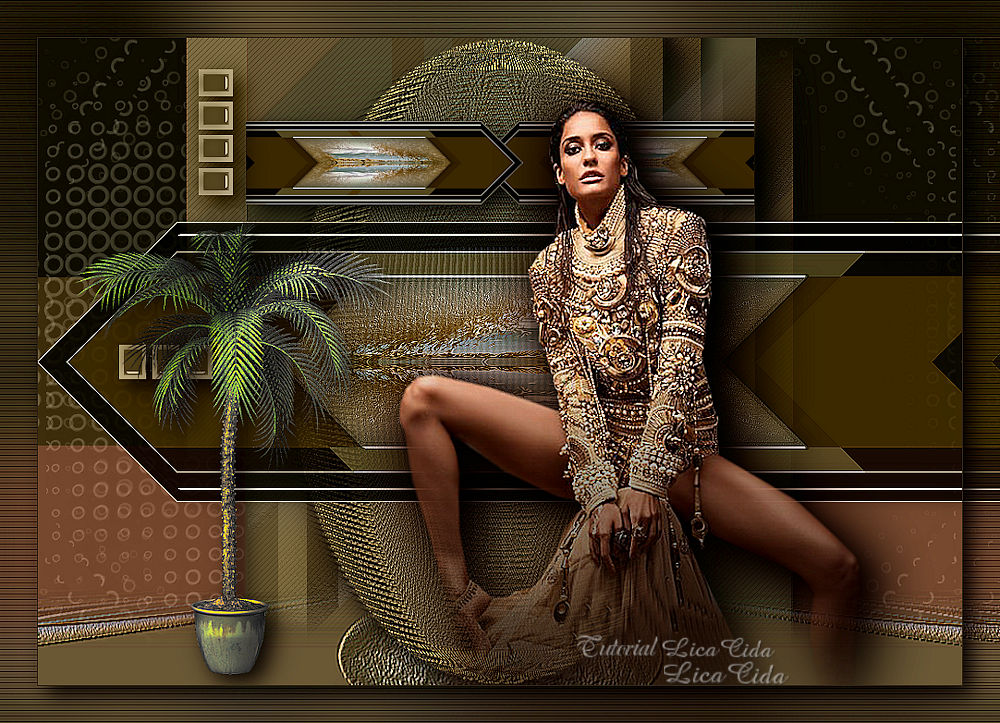
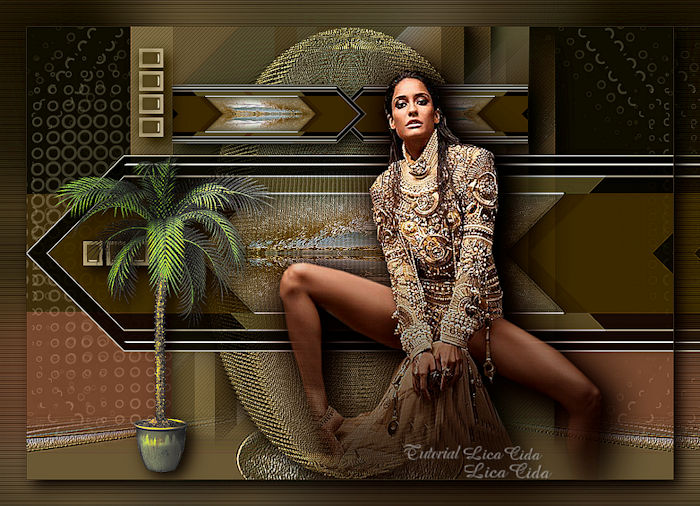
"Ella"
Preset katrina _mp \ do Eye Candy
5/Impact/Glass.
(Dar duplo clic sobre o preset para
importar-lo ao Plugin).
Tubes
: 5120-luzcristina\ nena-landscape-5054.
Decos:
deco arquivonet ( darei o credito se souber autor ) \ deco1lc
\R11GardenPotPlant2014-145.
Brush:
OBG_BRUSH_33 -trabalhadolc.
Mask:002gradientedw.
(Agradeço)
Marca
D'água . Efeitos do PSP.
Versão usada PSPX8.
Plugins
Plugin Mosaic ToolKit Plus.
Importá-lo para Unlimited 2 _Plugin Harry's
Button Toos .
( anexado nos materiais ).
Plugin
Alien Skin Eye Candy 5: Impact.
Plugin
Carolaine and Sensibility.
Plugin MuRa's Meister.
Tutorial _Roteiro
1-Abrir nova imagem transparente de 1000 x 700.
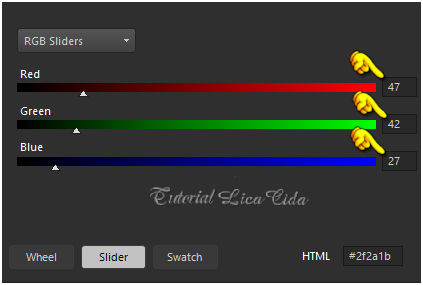
Preencher com o
gradiente formado pelas cores retiradas
do landscape _#2f2a1b ( usar no foreground ) e #918757( usar no
background) Configurar Linear . Angle 45 e Repeats 1.
Invert desmarcado.
 2-Selections\ Select All . Edit
Copy no nena-landscape-5054 \ Edit Paste Into Selection .
Selections\ Select none.
_Effects \ Seamless Tiling \ Default
. Transition 100.
_Adjust \ Blur \ Gaussian
Blur . R= 32,00.
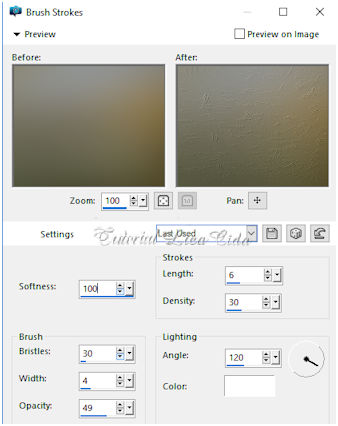
3-Effects\ Art Media Effects \Brush Strokes.
100\30\4\49 _ 6\30\120 Color=#ffffff.
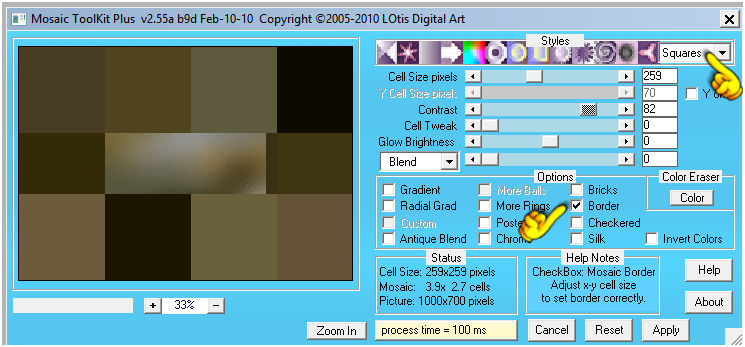
 4-Plugin Mosaic ToolKit Plus \ LOtis Digital
Art.
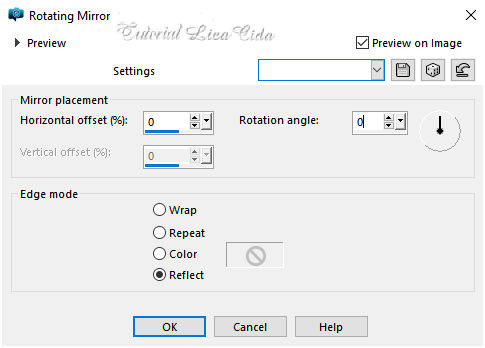
 _Effects \Reflection
Effects \ Rotating
Mirror .
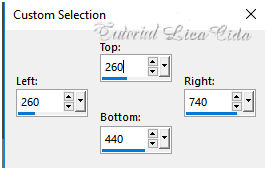
 5-
Seleção Personalizada.
(tecleS)
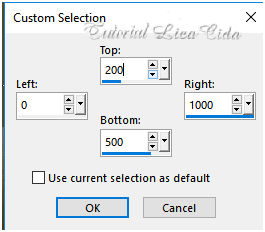 _Promete Selection to
Layer.
6- ( Filters
Unlimited 2 ) Harry's Button Toos.
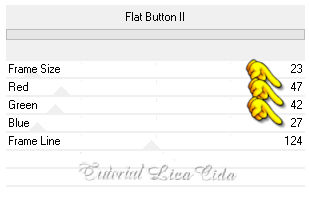 _Você vai usar os
valores marcados de acordo com a cor usada ( para criar sua borda
).
Usei a do
foreground #2f2a1b.
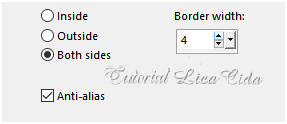
 7-Selections \Modify \Contract... 15
pxls.
8-Selections \Modify \Select Selection
Borders...
 9-Plugin Alien Skin Eye Candy 5: Impact\
Glass... Setting\ use Setting\ katrina
.
_ Selections\ Select
none.
10-Seleção Personalizada 2.
(tecleS)
 _Edit Copy no nena-landscape-5054 \
Edit Paste Into Selection .
_Adjust\ Sharpness\ Sharpen
More.
_Selections \Modify \Select Selection
Borders..._ print ítem
8.
_Plugin Alien Skin Eye Candy 5: Impact\
Glass... Setting\ use Setting\ katrina
.
_ Selections\ Select
none.
*Plugin
Alien Skin Eye Candy 5 : Impact\ Perspective
Shadow_Blurry. ** Tirar a visibilidade dessa layer (
promoted selection
).
11- Ativar a
Raster1.
Selecionar como mostra o print
( usar a ferramenta Selection Tool _Default
).
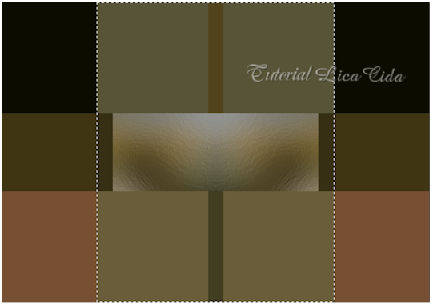 _Promete Selection
to Layer.
_ Selections\ Select
none.
12-Plugin \ Carolaine and Sensibility \
CS_Halloween2_Default.
65\0\95\65.
*Plugin Alien
Skin Eye Candy 5 : Impact\ Perspective
Shadow_Blurry. Layers duplicate.
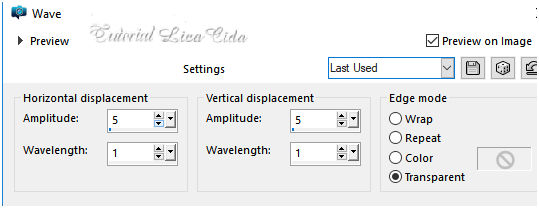
13-Effects\ Distortion Effects\ Wave.
 14-Effects\ Geometric Effects\ Circle _
Transparent.
*Plugin Alien
Skin Eye Candy 5 : Impact\ Perspective
Shadow_Blurry. _ Layers duplicate. Image Mirror Horizontal.
Layers\ Merge\ Merge Down.
_Adjust\ Sharpness\
Sharpen.
_Emboss3.
*Abrir a visibilidade da raster superior (promoted
selection
).
_Ativar a layer promoted selection
1.
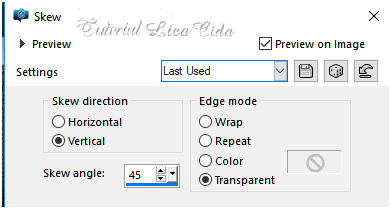
 15-Effects\ Geometric
Effects\Skew.
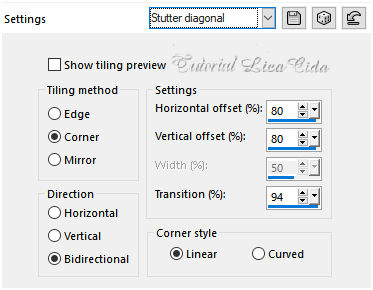
 _Effects \ Seamless
Tiling \ Stutter
diagonal.
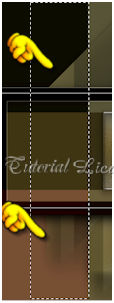
 *Plugin Alien
Skin Eye Candy 5 : Impact\ Perspective
Shadow_Blurry. _Selecionar o efeito como mostra o print .
Delete.
 _ Selections\ Select
none.
16-Ativar a
Raster1.
_Edit Copy
no decolc1\ Paste As New
Layer.
17-Volto a
raster1.
_Edit Copy no OBG_BRUSH_33
-trabalhadolc\ Paste As New
Layer.
( opacity 48% _blend
mode=luminance(l) ).
18-Layer superior ( promoted
selection
).
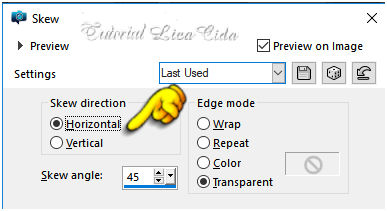
Effects\ Geometric
Effects\Skew.
 _Plugin Graphics Plus \ Vertical
Mirror _ Default. 128\
0.
_Adjust\ Sharpness\
Sharpen.
_Plugin
AAA Filters\ Custom_Landscape (
Default).
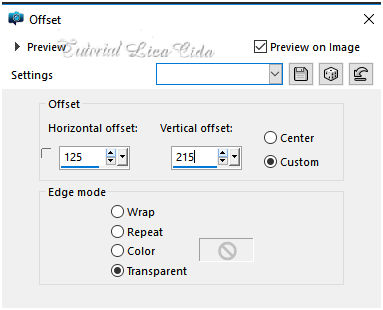
Layers duplicate. Resize 30%
_Effects\ Image Effects\ Offset...
 _ Layers duplicate. Image
Mirror Horizontal.
Layers\ Merge\ Merge Down.
*Plugin Alien Skin Eye Candy 5 :
Impact\ Perspective
Shadow_Blurry.
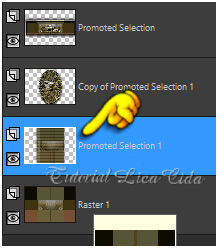
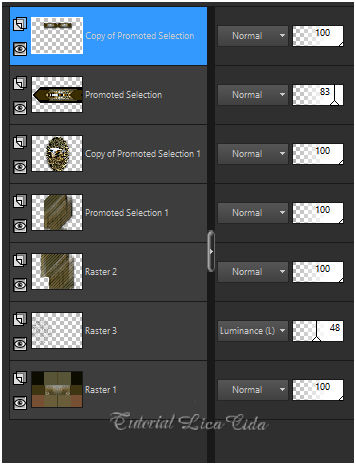
Blends, opacitys e layers estão
assim:
Observe a opacity das layers Copy of
Promoted Selection e Promoted
Selection.
 19-Ativar a
raster1.
Layers
duplicate.
_ Plugin MuRa's Meister \
Pole
Transform_Default.
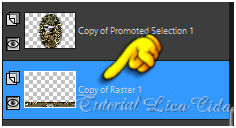
20-Plugin MuRa's Meister \
Perspective Tiling. Height
15.
_subir a layer ,usar abaixo da layer
Copy of Promoted Selection
1.
 * Com a Ferramenta Magic Wand \ Feather 60 \ Clique na parte transparente . Deletar ( três - quatro \ vezes_ para suavizar o efeito ). Selections \ Select none._Adjust\ Sharpness\
Sharpen.
_Emboss3 , repetir
emboss3.
21-Edit
Copy no deco arquivonet\ Paste As New Layer.
Layer\ Arrange\ Bring to Top. (
luminance (l)
).
( usar duas vezes como modelo
)
Layers\ Merge\ Merge
Down.
*Plugin Alien Skin Eye Candy 5 :
Impact\ Perspective
Shadow_Blurry.
22-Edit
Copy no tube 5120-luzcristina\ Paste As New Layer.
Posicione\use a gosto.
Opcional : usar uma mask gradiente
para realçar o pé. ( segue anexo
).
23-Edit
Copy no R11GardenPotPlant2014-145\ Paste As New Layer.
Posicione\use a
gosto.
*Image \ Add
Borders \ 1 pxl color = foreground
#2f2a1b.
24-Selections \Select All . Edit
Copy.
Image \ Add
Borders \ 40 pxls color
=#ffffff.
Invert
24-Edit Paste Into Selection a imagem que você
copiou ( ítem 24).
_ Adjust \ Blur \ Gaussian
Blur . R= 32,00.
_Plugin Graphics Plus\ Cross Shadow_Default.
25-Plugin \ Carolaine and Sensibility \
CS_Halloween2_Default.
65\0\95\65.
_Adjust\ Sharpness\
Sharpen.
Invert
*Plugin Alien Skin Eye Candy 5 :
Impact\ Perspective
Shadow_Blurry.
Selections\ Select
none.
*Plugin
AAA Filters\ Custom_Sharp(
Default).
(
Opcional) _ Resize \ Width 1000 pxls. Aplicar
a Marca D'agua.
Assine
e salve. Aparecida \ licacida , janeiro de
2020.
02
Espero que gostem.
Obrigada!
  |