
|
|
|
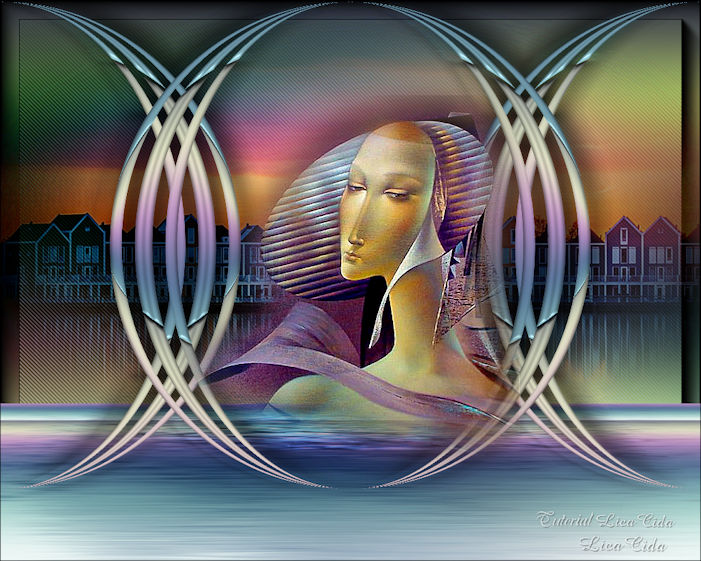
"Silence"
Gradiente
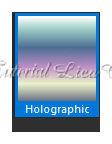
Holographic .
( Salve em sua
pasta de gradients My PSP Files ) .
Seleção: selsilencelc.PspSelection.
( Salve em sua
pasta de seleções My PSP Files )
Preset
_InnerBevel_Deep Beveled ( Guardar em sua pasta de Presets My
PSP Files).
Preset_SmudgeBrush_flood_mara1( Guardar em sua
pasta de Presets My PSP Files). . Tubes:
rocio_4066\ 286_paysage_p3_animabelle.
(Agradeço)
Marca
D'água . Efeitos do PSP.
Versão usada PSPX8.
Plugins
MuRa's
Meister.
Plugin
Flaming Pear.
Plugin DC
Layer.
Plugin Nick
Software.
Tutorial _Roteiro
1-Abrir uma nova imagem de 1000 x 700
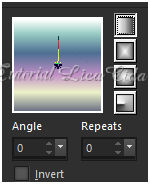
.Preencher com
o
gradiente Holographic
 usando
as cores : foreground #f39e9f \ background
#aff38f.
Configurar Linear . Angle 0\ Repeats 0. Invert
desmarcado.
 _Adjust\
Blur\ Gaussian Blur... R:38,00.
Image\ Mirror\
Mirror Vertical.
*Layer
Duplicate _ Tirar a visibilidade da raster1.
2-Selections \Load \ Save Selection \
Load Selection From Disk \ Load \silencelc.PspSelection.
_Promote Selection to
Layer.
3- Effects\ 3D Effects\
Inner Bevel.
Preset
_InnerBevel_Deep Beveled. Selections\ Select
none.
*Layer
Duplicate. Image\ Mirror\ Mirror Horizontal.
Layer\
Merge\ Merge Down.
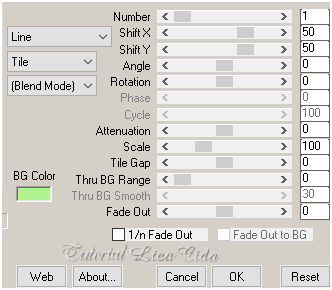
4-Plugin MuRa's Meister \Copies.
 5-Effects\
Geometric Effects\ Circle_Transparent.
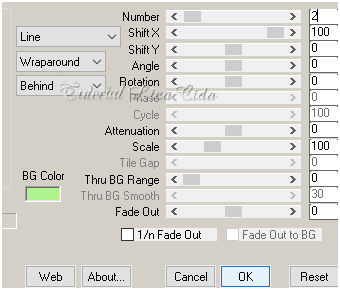
6-Plugin MuRa's
Meister \Copies.
_ Effects \ 3D Effects \ Drop Shadow (menos)
-10\ (menos) -1\75\ 50,00
. Color=#000000.
*Layer
Duplicate.
7-Effects\
Distortion Effects\
Wind.
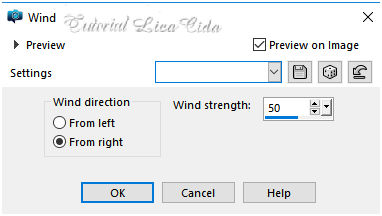 Repetir Repetir
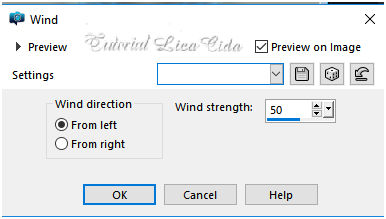
Blende
Mode=Multiply.
Layer\
Arrange\ Move Down.
8-Edit
Copy no 286_paysage_p3_animabelle \ Paste As New
Layer.
Resize
80%.
Adjust\ Sharpness \ Sharpen
More.
Layer\ Arrange\ Move
Dow.
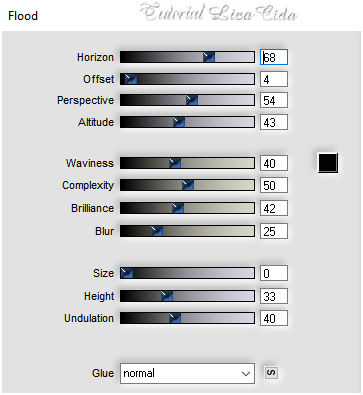
9- Plugin Flaming Pear\
Flood.
Use Horizon de acordo com sua
paisagem.
10- Image \ Canvas Size 1000 x
800 .
Bottom
100.
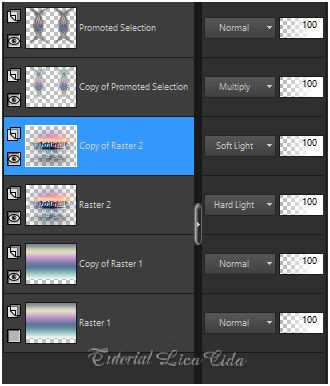
11-Ativar a ferramenta SmudgeBrush \
procurar o Preset_SmudgeBrush_flood_mara1\ suavisar o efeito
flood.
Blend Mode =Hard
Light.
Duplicar a layer e mudar o
Blend Mode para Soft
Ligth.
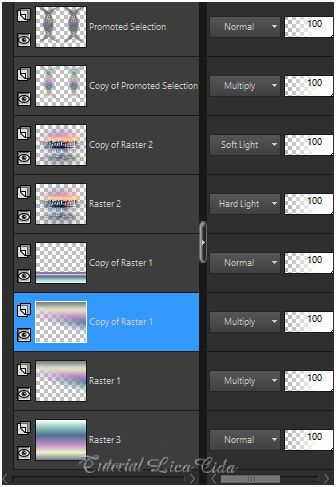
as layers estão assim:
12- Ativar a Copy of
Raster1.
Plugin MuRa's Meister \
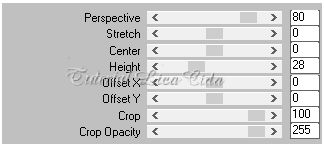
Perspective Tiling.
13-Nova Layer\ Send to
Bottom.
Preencher com o gradiente
formado no
ítem1.
( obs: não dê mirror vertical )

14- Abrir a visibilidade da raster1 e
ativar a
layer.
Plugin DC Layer\
SideMerge...
Blend Mode=Multiply. Duplico a
layer.
layer\blends\opacits
(use a
gosto)
15-Ativar a layer
superior.
Edit Copy no tube
rocio_4066 \ Paste As New
Layer.
Adjust\ Sharpness \ Sharpen
More.
*Opcional
_ Effects \ 3D Effects \ Drop Shadow (menos) -10\
(menos) -1\75\ 50,00
. Color=#000000.
16- Ativar a Raster3 ( layer inferior
)
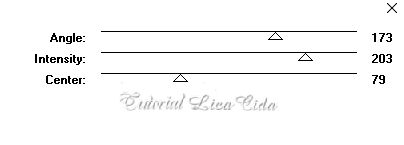
Effects\ Artistic Effects\
Halftone.
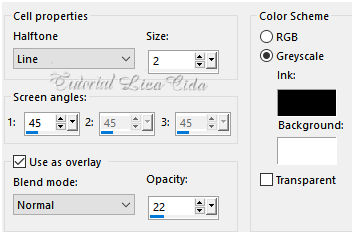
17-Plugin Nick Software\ Color
EfexPro 3.0\ Bi-Color Filters.
Color Set\ Green
Brown1. 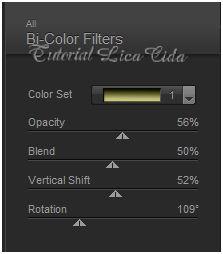
18-Plugin AAA Frames / Foto
Frame_Default .
Width26.
*Image add borderes 1 pxl (
color #000000
). Aplicar a Marca D'agua.
Assine e
salve. Aparecida \ licacida , outubro de
2019.
Espero que gostem.
Obrigada
 |
