|
|
|
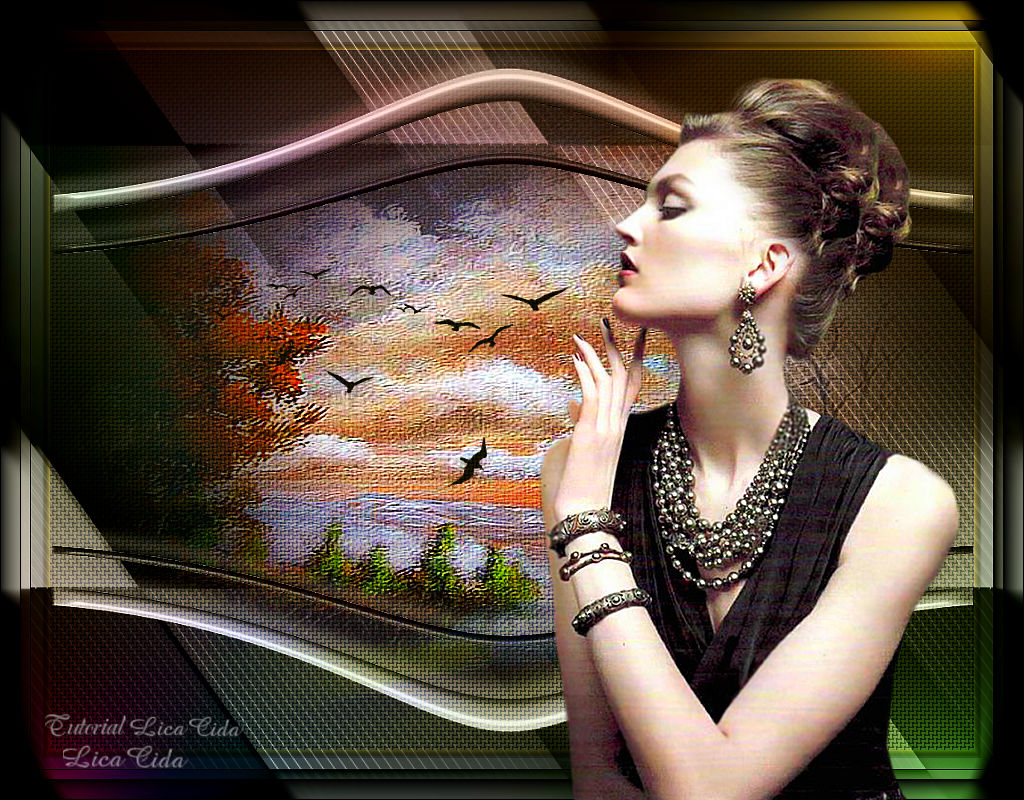
"Pinuccia" Com Carinho!!!
Seleção:ladanca( mp)
PspSelection. ( Salve em sua pasta de seleções
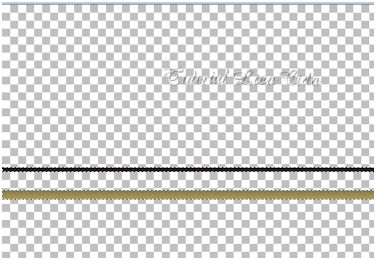
My PSP Files ). Tubes: 5057-luzcristina \
5034-luzcristina
Brushes: bird_arquivonet
Deco_Ildiko_create_deco (120)
(Agradeço)
Marca
D'água . Efeitos do PSP.
Versão usada PSPX8.
Plugins
Plugin
Distort
Plugin
Galaxy
Plugin
dsb flux
Tutorial _Roteiro
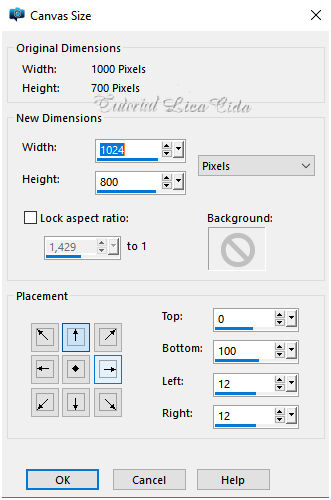
1-Abrir uma
nova imagem transparente de 1024 x 700
pxls.
2-Selections
\Load \ Save Selection \ Load Selection From Disk \ Load
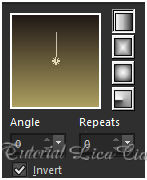
\ladanca.PspSelection. 3-Preencher com o gradiente
formado pelas cores
 #211916 e #211916 e
 #ac9e5f. #ac9e5f.
Configurar Linear . Angle 0 e Repeats 0.
Invert marcado.
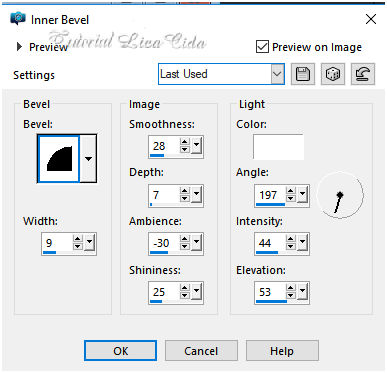
  4-Effects\ 3D Effects\ Inner Bevel...
 Selections\ Select
none.
*Image\Rotate
Left.
5- Plugin Distort\
Shear...
 *Image\ Rotate
Right.
6-Effects\ Distortion
Effects\ Pinch .
S=100%.
7-Image Canvas
Size.
Layer\ Duplicate. Image
Mirror
Vertical.
*Nesta layer:
Effects\ Image Effects \
Offset... 0
\152.
Layer\ Duplicate. Image
Mirror
Vertical.
Layer \Merge Down.
*Delete a
Raster1. Effects\3D Effects\ Drop Shadow.
Color=#ac9e5f
 _Resize90% .
8-Selections \ Modify\ Contract ...50 pxls.
Nova Layer
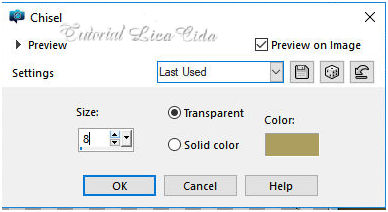
9-Effects\ 3D Effects\ Chisel ( Color=#ac9e5f ).
 10-Nesta
layer:
Preencher
o espaço selecionado com o gradiente formado pelas
cores acima.
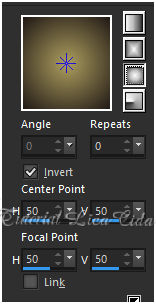
Configurar Sunburst . Angle 0 e Repeats 0.
Invert marcado. CP=H e V\ 50.FP=H e V\50.
Flood Fill _Opacity
30%.
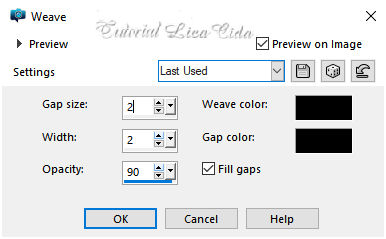
11-Effects \Texture Effects\ Weave.
Selections\ Select
none.
12-Nova Layer\Send to
Bottom.
Preencher com o Gradiente Sunburst (
print
acima).
Flood Fill _Opacity
100%.
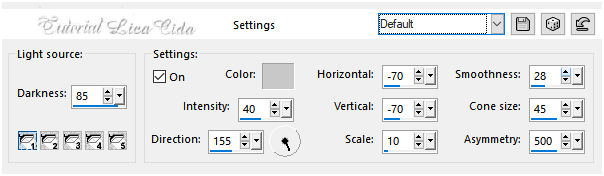
13-Effects\ Illumination Effects\ Preset Illumination\
Lights\ Default.
 14-Plugin Galaxy
 Layer\
Duplicate
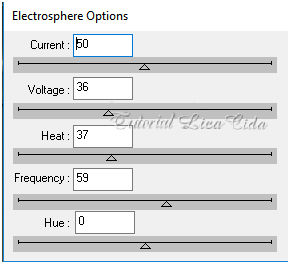
15-Plugin dsb flux ...Electrosphere.
*Plugin AAA Frames\ Foto Frame\ Width 30.
_Image Mirror Vertical (opcional)
16-Nova
layer
Selections\ Select All .
Edit Copy
no Ildiko_create_deco (120) \ Edit Paste Into Selection.
Selections\ Select
none.
Repetir: *Plugin AAA Frames\ Foto Frame\ Width 30.
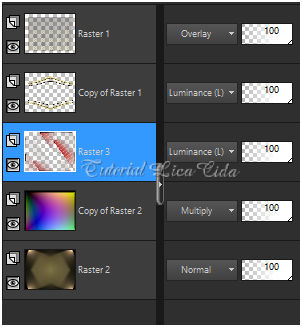
layers\blends\opacitys
use a gosto
 17- Edit Copy no tube 5034-luzcristina e
avesarquivo net \ Paste As New Layer.
( usar acima da raster 3) (raster4 e 5)
Layer\
Merge Visible.
**Plugin
AAA Filters\ Custom_Landscape ( Default). (
Opcional)
*Plugin AAA Frames\ Foto
Frame\ Width 20.
18-Edit Copy
no tube 5057-luzcristina \ Paste As New
Layer.
Posicione Aplicar a Marca D'agua.
Assine e
salve. Aparecida \ licacida , outubro de
2018.
Espero que gostem.
Obrigada!
   |