|
|
|
" Clara" Seleções:
selclara1lc.PspSelection. selclara2lc.PspSelection.
( Salve em sua
pasta de seleções My PSP Files ) .
Tubes:
tube3231_mulher_mara_pontes \
calguismistsecenery29610\spiky_cordyline_by_lilipilyspirit-d4zkex2.
aves ( arquivo).
Deco: claralc Mask:Narah_Mask_1392.
(Agradeço)
Marca
D'água . Efeitos do PSP.
Versão usada PSPX8.
Plugins
Plugin
Mehdi.
Plugin
L en K's.
Plugin
Toadies.
Plugin
AP [Line] Lines.
Plugin Flaming Pear .
Plugin
Cybia.
FFFB.
Tutorial _Roteiro
Configurar:
Foreground #d0bd84 \
Background #172a31
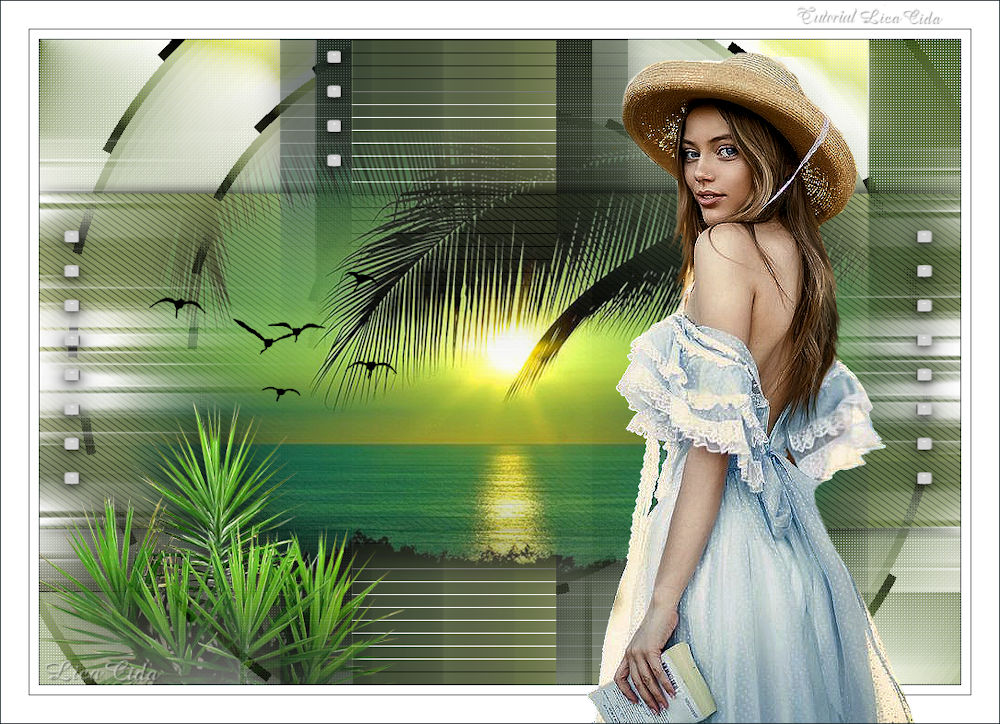
1-Abrir uma nova imagem
transparente de 1000 x 700 pxls. Preencher com
o gradiente formado pelas
cores acima.
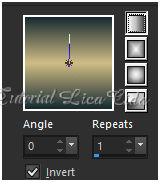
Configurar Linear. Angle 0 \Repeats 1. Invert
marcado.
 2- Select All. Edit
Copy no calguismistsecenery29610 \ Edit Paste
Into Selection . Selections\ Select none.
_Effects\
Image Effects\ Seamless Tiling: Default \ Transition
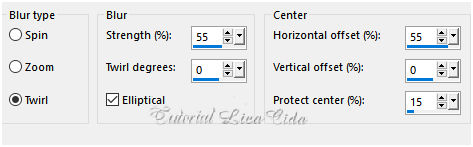
(%) 100. 3- Adjust\
Blur\ Radial Blur.
 Adjust\ Add/ Remove
Noise \ JPEG Artifactal Removal... ( Maximum\ C=78) .
Plugin
FMTT\ Blend Emboss_ Default.
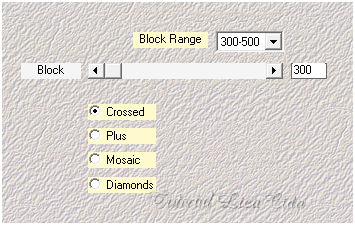
4-Plugin Mehdi \ Sorting
Tiles.

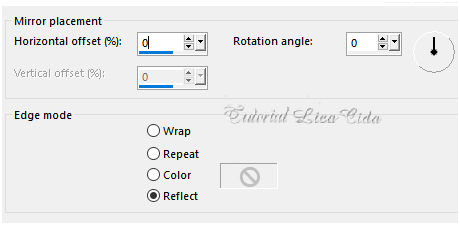
5-Effects \Reflection
Effects \ Rotating Mirror .
6-Plugin Graphics Plus\ Vertical
Mirror_Default ( 128\0 ).
7-Plugin Mehdi \ Sorting
Tiles.
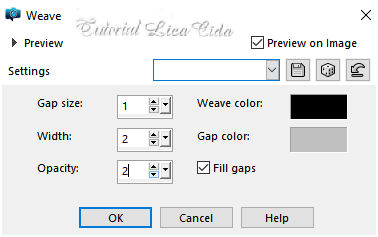
8-Plugin Mehdi \ Weave.

9- Selections \Load \ Save
Selection \ Load Selection From Disk \ Load
\selclara1lc.PspSelection. Promote Selection to
Layer.
10-Plugin L
en K's \ Mayra_Default .
(0\
149\76\2)
Selections\ Select
none. 11-Plugin Toadies\ What Are You?... 20\0 (
zero).
_Effects\3D Effects\ Drop
Shadow. (menos) -10\ (menos) -1\ 75\ 50,00 . (Color=#000000).
12- Nova Layer. Preencher
com a
Color=#ffffff.
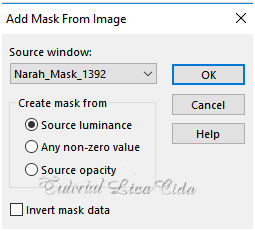
Aplicar a Mask
Narah_Mask_1392.
Layer\Merge \Group.
Adjust\ Sharpness\ Sharpen
More.
13- Ativar a Raster1.
Selections \Load \ Save
Selection \ Load Selection From Disk \ Load
\selclara2lc.PspSelection. Promote Selection to
Layer.
*Layer\ Arrange\ Move Up.
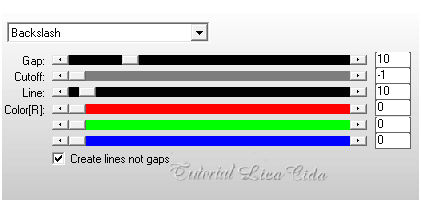
14-Plugin \AP [Line] Lines \
SilverLining.
 Selections\ Select
none.
_Effects\3D Effects\ Drop
Shadow. (menos) -10\ (menos) -1\ 75\ 50,00 . (Color=#000000).
15-Edit Copy
no calguismistsecenery29610\ Paste As New
Layer.
Adjust\ Sharpness\ Sharpen
More.
*Plugin
AAA Filters\ Custom_Landscape ( Default).
)
Opcional.
16- Nas layers selecionadas :
Group-Raster2 e Promoted Selection
1.
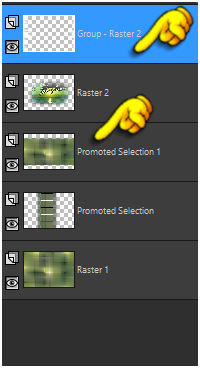
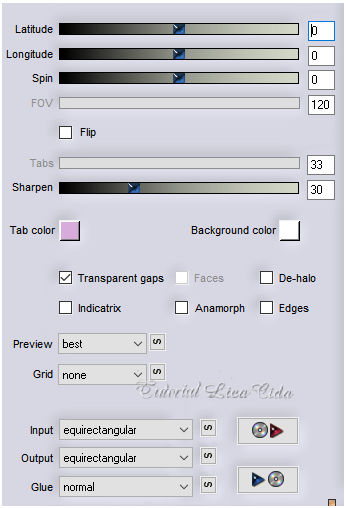
Aplicar o Plugin Flaming
Pear\
Flexify2...
17- Ativar a
Raster1.
Effects\ Texture Effects\
Weave.
Layer
Duplicate.
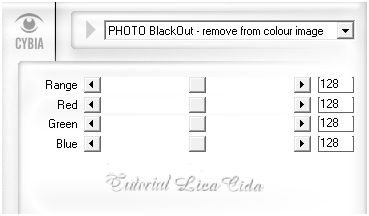
18-Plugin Cybia
\AlphaWorks.
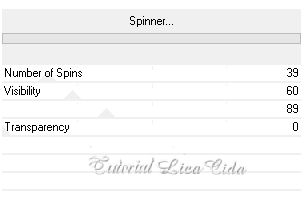
19-FFFB\
Spinner...
Layers\ Blends\
Opacitys
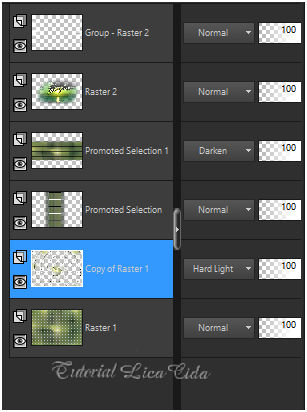
20-Ativar a Layer Superior \Group-Raster2 .
Edit
Copy na spiky_cordyline_by_lilipilyspirit-d4zkex2\ Paste As New
Layer.
Posisione a
gosto.
21- Edit Copy nas aves\ Paste As New
Layer.
Posisione a gosto. (
raster4)
22-Edit Copy no decoclaralc\ Paste As
New
Layer.
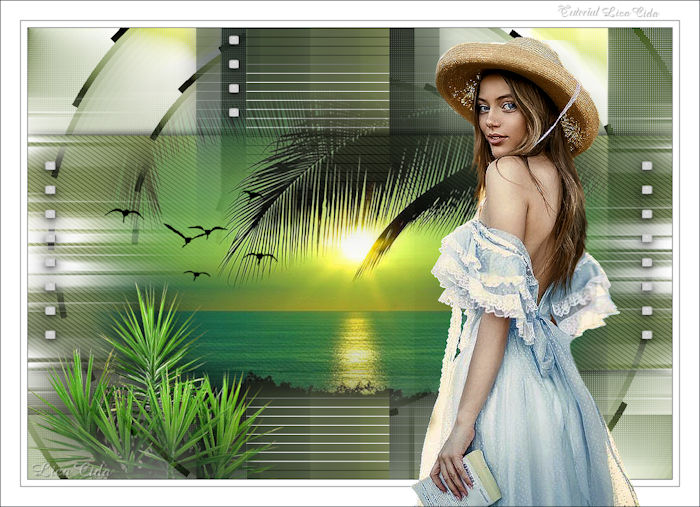
*Retire quatro
quadradinhos e posicione com nova layer... veja modelo
.
23-Image \ Add
Borders \ 1 pxl color =
background #172a31.
Image \ Add
Borders \ 10 pxls color
=#ffffff.
Image \ Add
Borders \ 1 pxl color =
background #172a31.
24-Image \ Add
Borders \ 30 pxls color
=#ffffff.
25-Edit Copy no
tube3231_mulher_mara_pontes\Paste As New
Layer.
Posicione.
26-Image \ Add
Borders \ 1 pxl color =
background #172a31.
Resize \ Width 1000 pxls.
Aplicar a Marca D'agua.
Assine e
salve. Aparecida \ licacida , outubro de
2019.
Espero que gostem.
Obrigada!
 |
